共计 12568 个字符,预计需要花费 32 分钟才能阅读完成。
Rainloop 是一个使用 PHP 编写的,开源免费的网页邮件客户端。他支持包括 Google、Yahoo、OutLook 在内的主流的邮件服务器,当然,他也支持你自己的本地邮件服务器。它看起来大致就像使用 IMAP 和 SMTP 协议的 MUA(邮件客户端)一样。
RainLoop 示例
可以看一下 RainLoop 作者安装的演示页面:http://demo.rainloop.net/。

在 Arch Linux 上安装 RainLoop
一旦在您的服务器部署上 Rainloop,剩余要做的唯一的事情是通过 Web 浏览器访问您的 Rainloop,并提供你正在使用的邮件服务器信息。
本教程包含了在 Arch Linux上的Rainloop 网页客户端的安装流程,包括如何进行配置 Apache 或 Nginx, 当然本教程使用修改 Hosts 的方式,从而避免了 DNS 的访问。
If you also need references on installing Rainloop on Debian and Red Hat systems visit the previous RainLoop Webmail article at.
如果你还是需要一篇在Debian 和 Red Hat 安装 RainLoop Webmail 的教程,你可以看这篇文章:
- 在 Debian 和 RedHat 系的 Linux 上安装 RainLoop Webmail
以及在 Ubuntu 服务器中安装 RainLoop Webmail 的教程,你可以看这篇文章:
- 如何在 Ubuntu server 中设置 RainLoop Webmail
系统要求
对 Nginx
- LEMP 架构及应用部署——Nginx 延伸 http://www.linuxidc.com/Linux/2013-07/87548.htm
- CentOS 5.6+Nginx 1.0+PHP 5.3.6+MySQL 5.5.11 构建 LEMP(X64)平台 http://www.linuxidc.com/Linux/2011-07/38107.htm
对 Apache
Ubuntu 13.04 安装 LAMP\Vsftpd\Webmin\phpMyAdmin 服务及设置 http://www.linuxidc.com/Linux/2013-06/86250.htm
CentOS 5.9 下编译安装 LAMP(Apache 2.2.44+MySQL 5.6.10+PHP 5.4.12) http://www.linuxidc.com/Linux/2013-03/80333p3.htm
RedHat 5.4 下 Web 服务器架构之源码构建 LAMP 环境及应用 PHPWind http://www.linuxidc.com/Linux/2012-10/72484p2.htm
LAMP 源码环境搭建 WEB 服务器 Linux+Apache+MySQL+PHP http://www.linuxidc.com/Linux/2013-05/84882.htm
Step 1: 在 Nginx 或者 Apache 上创建虚拟主机
1. 假设你已经如上面介绍的链接所述,配置好了您的服务器(Nginx或 Apache),你需要做的第一件事是在 Hosts 文件里创建一个原始解析记录,以指向 的 Arch Linux系统的 IP。
对于 Linux 系统,修改 /etc/hosts 文件并且在你的 localhost 条目之下添加 Rainloop 的虚拟域。如下:
- 127.0.0.1 localhost.localdomain localhost rainloop.lan
- 192.168.1.33 rainloop.lan
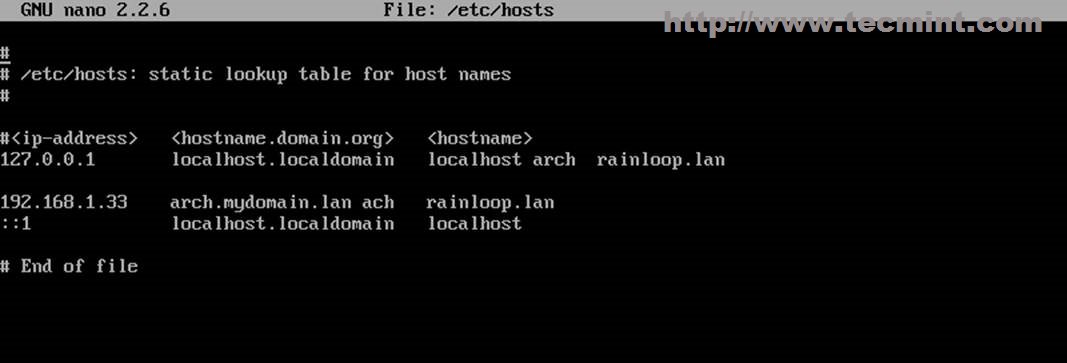
添加域信息
如果是 Windows 系统,则修改 C:\Windows\System32\drivers\etc\hosts 并且将接下来的内容添加到你的文件里:
- 192.168.1.33 rainloop.lan
2. 使用 ping 命令确认本地的 Rainloop 域名创建成功之后,然后在 Apache 或 Nginx 中创建所需的 虚拟主机 和 SSL 配置。
Nginx 虚拟主机
在 /etc/nginx/sites-available/ 目录下使用如下命令创建一个名叫rainloop.lan 的文件:
- $ sudo nano /etc/nginx/sites–available/rainloop.conf
添加如下的文件内容:
- server {
- listen 80;
- server_name rainloop.lan;
- rewrite ^ https://$server_name$request_uri? permanent;
- access_log /var/log/nginx/rainloop.lan.access.log;
- error_log /var/log/nginx/rainloop.lan.error.log;
- root /srv/www/rainloop/;
- # serve static files
- location ~^/(images|javascript|js|css|flash|media|static)/{
- root /srv/www/rainloop/;
- expires 30d;
- }
- location /{
- index index.html index.htm index.php;
- autoindex on;
- autoindex_exact_size off;
- autoindex_localtime on;
- }
- location ^~/data {
- deny all;
- }
- location ~ \.php$ {
- #fastcgi_pass 127.0.0.1:9000; (depending on your php-fpm socket configuration)
- fastcgi_pass unix:/run/php–fpm/php–fpm.sock;
- fastcgi_index index.php;
- include fastcgi.conf;
- }
- }
接下来创建 SSL 配置文件:
- $ sudo nano /etc/nginx/sites–available/rainloop–ssl.conf
添加如下内容:
- server {
- listen 443 ssl;
- server_name rainloop.lan;
- ssl_certificate /etc/nginx/ssl/rainloop.lan.crt;
- ssl_certificate_key /etc/nginx/ssl/rainloop.lan.key;
- ssl_session_cache shared:SSL:1m;
- ssl_session_timeout 5m;
- ssl_ciphers HIGH:!aNULL:!MD5;
- ssl_prefer_server_ciphers on;
- access_log /var/log/nginx/rainloop.lan.access.log;
- error_log /var/log/nginx/rainloop.lan.error.log;
- root /srv/www/rainloop/;
- # serve static files
- location ~^/(images|javascript|js|css|flash|media|static)/{
- root /srv/www/rainloop/;
- expires 30d;
- }
- location ^~/data {
- deny all;
- }
- location /{
- index index.html index.htm index.php;
- autoindex on;
- autoindex_exact_size off;
- autoindex_localtime on;
- }
- location ~ \.php$ {
- #fastcgi_pass 127.0.0.1:9000; (depending on your php-fpm socket configuration)
- fastcgi_pass unix:/run/php–fpm/php–fpm.sock;
- fastcgi_index index.php;
- include fastcgi.conf;
- }
- }
接下来将会自动生成 Certificate 和Keys文件,然后在文件中叫Common Name* 的证书里中添加您的虚拟域名( rainloop.lan**)。
- $ sudo nginx_gen_ssl.sh
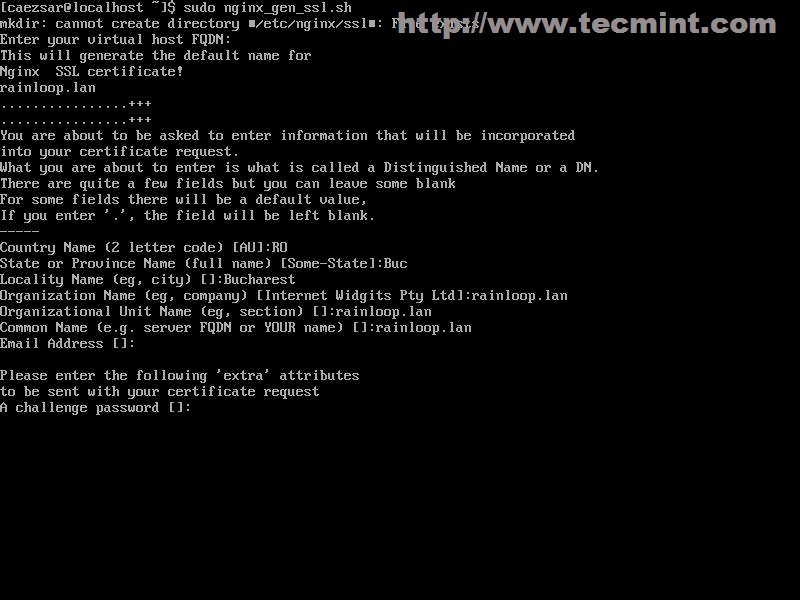
生成证书和密钥
生成证书和 SSL 密钥后,创建 Rainloop Web 服务器 根的文件路径(Rainloop PHP 文件所在的位置),然后启用虚拟主机,并重新启动 Nginx 的守护进程,应用配置。
- $ sudo mkdir –p /srv/www/rainloop
- $ sudo n2ensite rainloop
- $ sudo n2ensite rainloop–ssl
- $ sudo systemctl restart nginx

创建 RainLoop 网页向导
Apache 虚拟主机
在 /etc/httpd/conf/sites-available/ 中创建 rainloop.conf文件:
- $ sudo nano /etc/httpd/conf/sites–available/rainloop.conf
添加如下内容:
- <VirtualHost *:80>
- ServerName rainloop.lan
- DocumentRoot “/srv/www/rainloop/”
- ServerAdmin you@example.com
- ErrorLog “/var/log/httpd/rainloop-error_log”
- TransferLog “/var/log/httpd/rainloop-access_log”
- <Directory/>
- Options +Indexes +FollowSymLinks +ExecCGI
- AllowOverride All
- Order deny,allow
- Allow from all
- Require all granted
- </Directory>
- </VirtualHost>
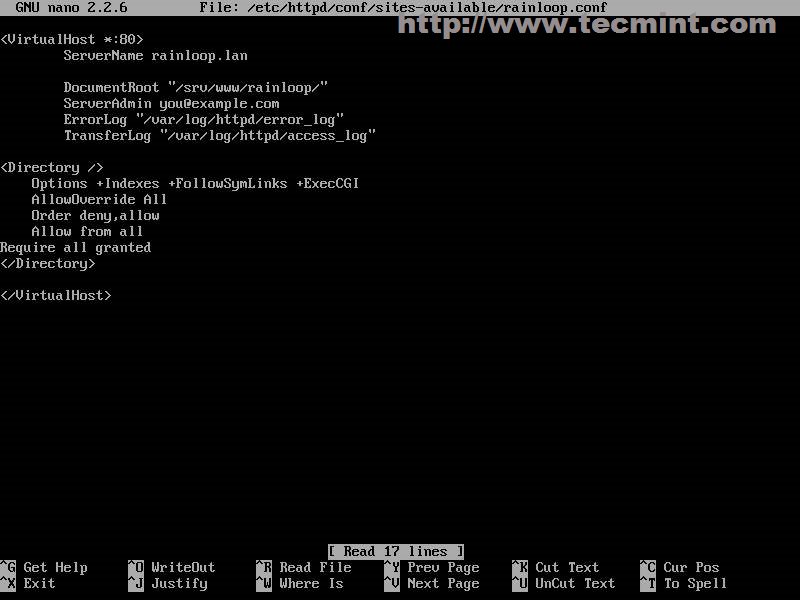
创建 Apache 虚拟主机
为 Apache 添加 SSL 支持:
- $ sudo nano /etc/httpd/conf/sites–available/rainloop–ssl.conf
添加如下文件内容:
- <VirtualHost *:443>
- ServerName rainloop.lan
- DocumentRoot “/srv/www/rainloop/”
- ServerAdmin you@example.com
- ErrorLog “/var/log/httpd/rainloop-ssl-error_log”
- TransferLog “/var/log/httpd/rainloop-ssl-access_log”
- SSLEngine on
- SSLCertificateFile “/etc/httpd/conf/ssl/rainloop.lan.crt”
- SSLCertificateKeyFile “/etc/httpd/conf/ssl/rainloop.lan.key”
- <FilesMatch“\.(cgi|shtml|phtml|php)$”>
- SSLOptions +StdEnvVars
- </FilesMatch>
- BrowserMatch “MSIE [2-5]” \
- nokeepalive ssl-unclean-shutdown \
- downgrade-1.0 force-response-1.0
- CustomLog “/var/log/httpd/ssl_request_log” \
- “%t %h %{SSL_PROTOCOL}x %{SSL_CIPHER}x \”%r\” %b”
- <Directory/>
- Options +Indexes +FollowSymLinks +ExecCGI
- AllowOverride All
- Order deny,allow
- Allow from all
- Require all granted
- </Directory>
- </VirtualHost>
接下来将会自动生成 Certificate 和Keys文件,然后在文件中叫Common Name* 的证书里中添加您的虚拟域名( rainloop.lan**)。
- $ sudo apache_gen_ssl

创建 SSL 证书和密钥
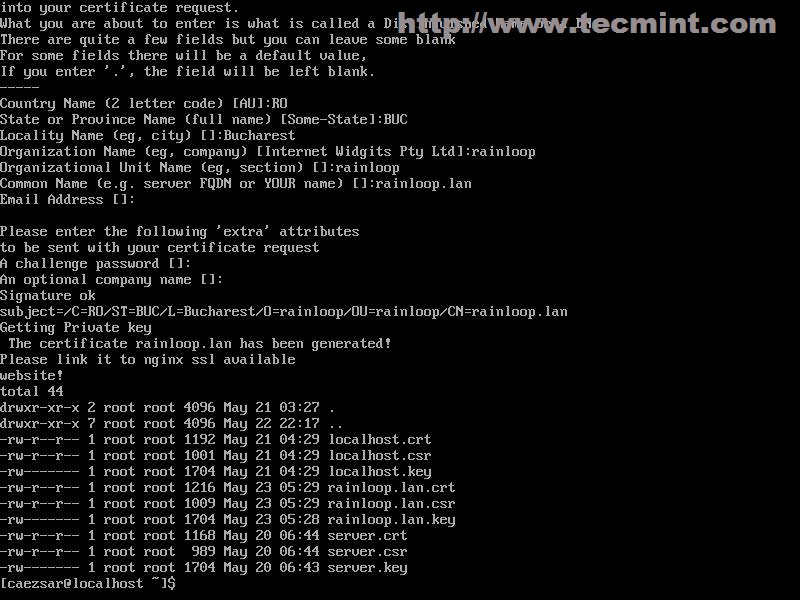
输入组织信息
After the Certificate and SSL keys are created, add Rainloop DocumentRoot path, then enable Virtual Hosts and restart Apache daemon to apply configurations. 在证书和密钥建立之后,创建 RainLoop 的 DocumentRoot 所指向的目录,之后激活虚拟主机,并且重启 Apache 应用设置。
- $ sudo mkdir –p /srv/www/rainloop
- $ sudo a2ensite rainloop
- $ sudo a2ensite rainloop–ssl
- $ sudo systemctl restart httpd

激活虚拟主机
更多详情见请继续阅读下一页的精彩内容:http://www.linuxidc.com/Linux/2014-06/103463p2.htm
Step 2: 添加必要的 PHP 支持
3. 无论您使用的是 Apache 或NginxWeb 服务器,您需要激活 php.ini 文件下中的 PHP 扩展,并将新服务器的 DocumentRoot 目录放到 open_basedir 配置中。
- $ sudo nano /etc/php/php.ini
找到并且取消如下的 PHP 扩展的注释(LCTT 译注,即启用这些模块):
- extension=iconv.so
- extension=imap.so
- extension=mcrypt.so
- extension=mssql.so
- extension=mysqli.so
- extension=openssl.so (注:启用 IMAPS 和 SMTP SSL protocols)
- extension=pdo_mysql.so
open_basedir 语句应该看起来类似如下:
- open_basedir =/srv/http/:/home/:/tmp/:/usr/share/pear/:/usr/share/webapps/:/etc/webapps/:/srv/www/
4. 在修改好 php.ini 之后,重启你的服务器,然后检查 phpinfo() 输出,去看看 SSL 协议是否已经激活。
- ———- 对于 ApacheWeb 服务器 ———-
- $ sudo systemctl restart httpd
- ———- 对于 NginxWeb 服务器 ———-
- $ sudo systemctl restart nginx
- $ sudo systemctl restart php–fpm
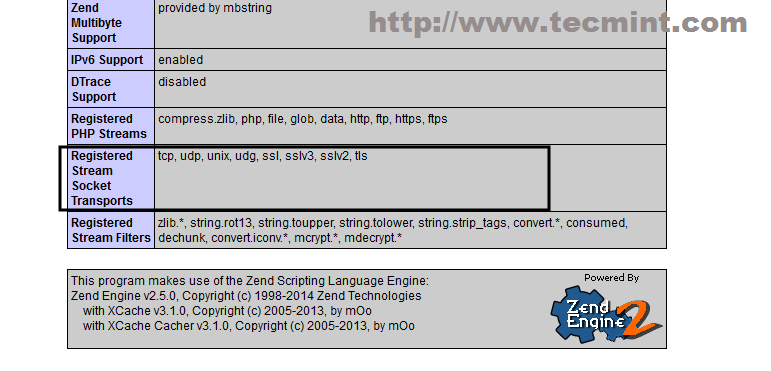
查看 PHP 信息
Step 3: 下载和安装 RainLoop Webmail
5.现在可以从官方网站下载 Rainloop 应用并解压缩到文档根目录了,但是需要首先安装 wget 的 和unzip程序(LCTT 译注,如果你已经有了可以忽略此步)。
- $ sudo pacman –S unzip wget
6. 使用 wget 命令或通过使用浏览器访问 http://rainloop.net/downloads/ 下载最新的源码包 Rainloop 压缩包。
- $ wget http://repository.rainloop.net/v1/rainloop-latest.zip

下载 RainLoop 包
7. 下载过程完成后,解压 Rainloop 压缩包到虚拟主机文档根目录路径(/srv/www/rainloop/ )。
- $ sudo unzip rainloop–latest.zip –d /srv/www/rainloop/
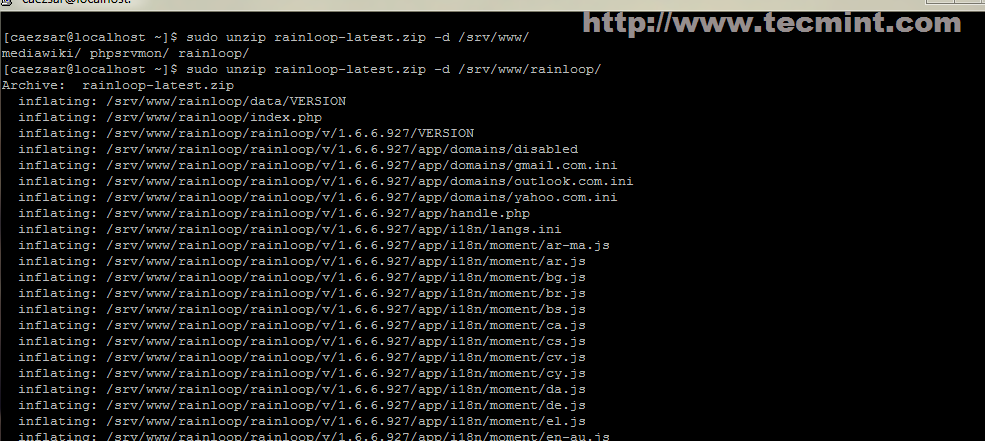
解压
8. 然后设置应用程序的默认路径下的权限。
- $ sudo chmod –R 755/srv/www/rainloop/
- $ sudo chown –R http:http /srv/www/rainloop/
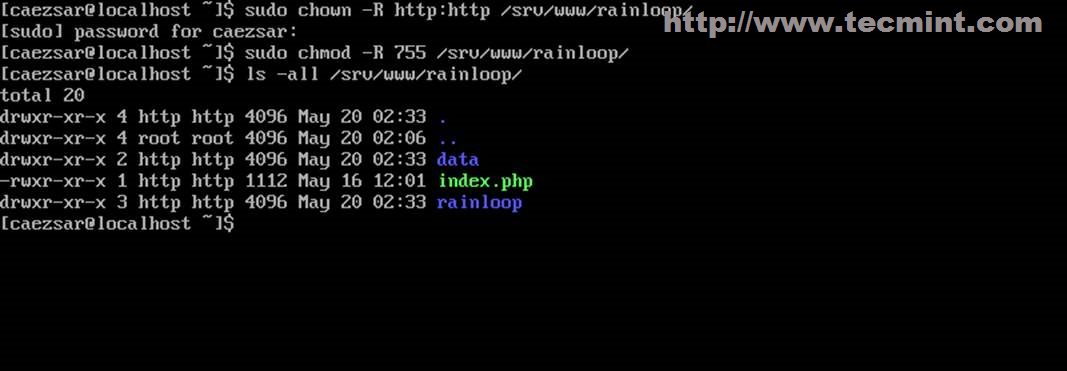
设置权限
Step 4: 通过网页配置 RainLoop
9. Rainloop 应用程序可以通过两种方式进行配置:使用浏览器或者系统 shell。如果要在终端配置就打开和编辑位于 / srv/www/rainloop/data/datada047852f16d2bc7352b24240a2f1599/default/configs/ 的 application.ini** 文件。
10. 若要从浏览器访问管理界面,使用下面的 URL 地址 https://rainloop.lan/?admin,然后提供输入默认的应用程序用户名密码,如下:
- User= admin
- Password=12345
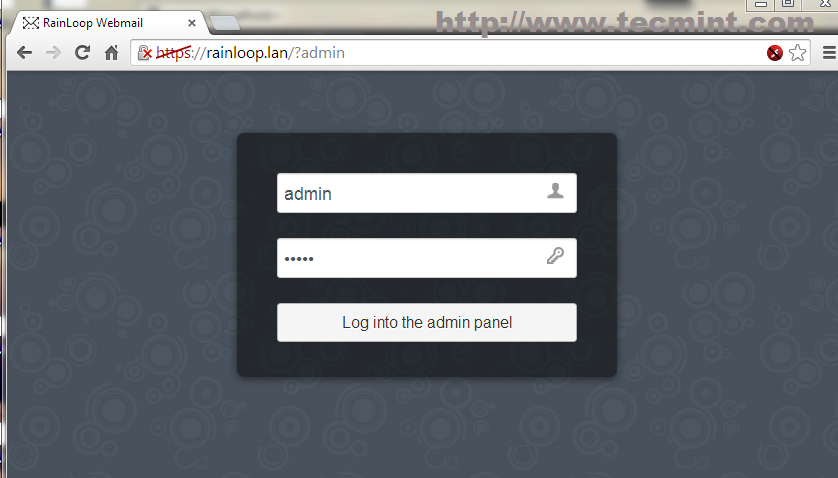
Rainloop Web 界面
11. 首次登录后,你会被警示需要更改默认密码,所以我劝你做这一点。
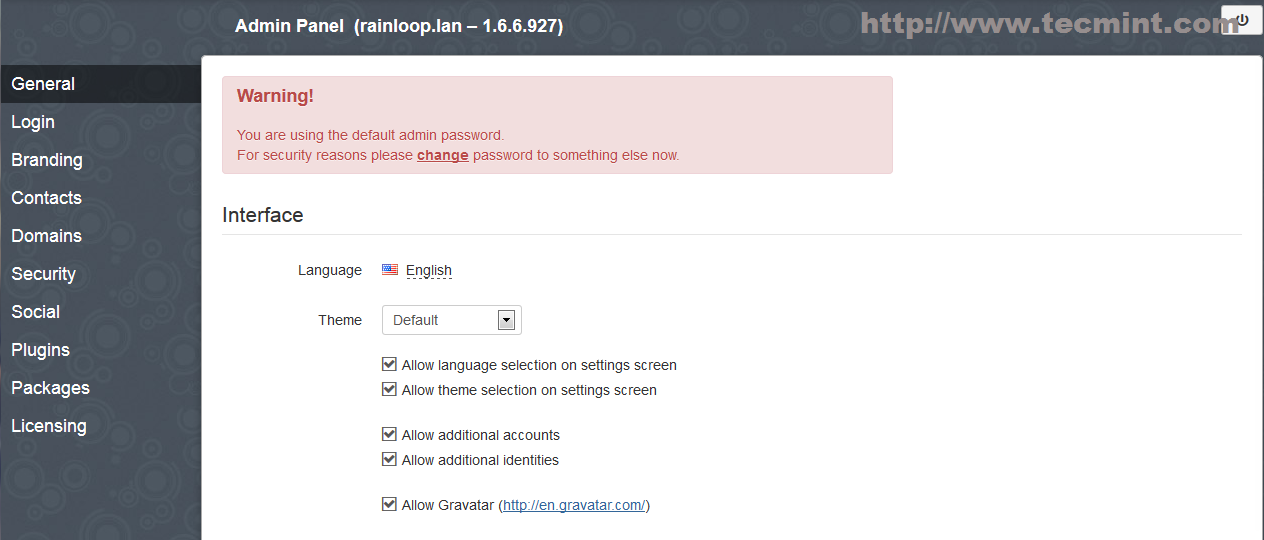
修改默认 Password
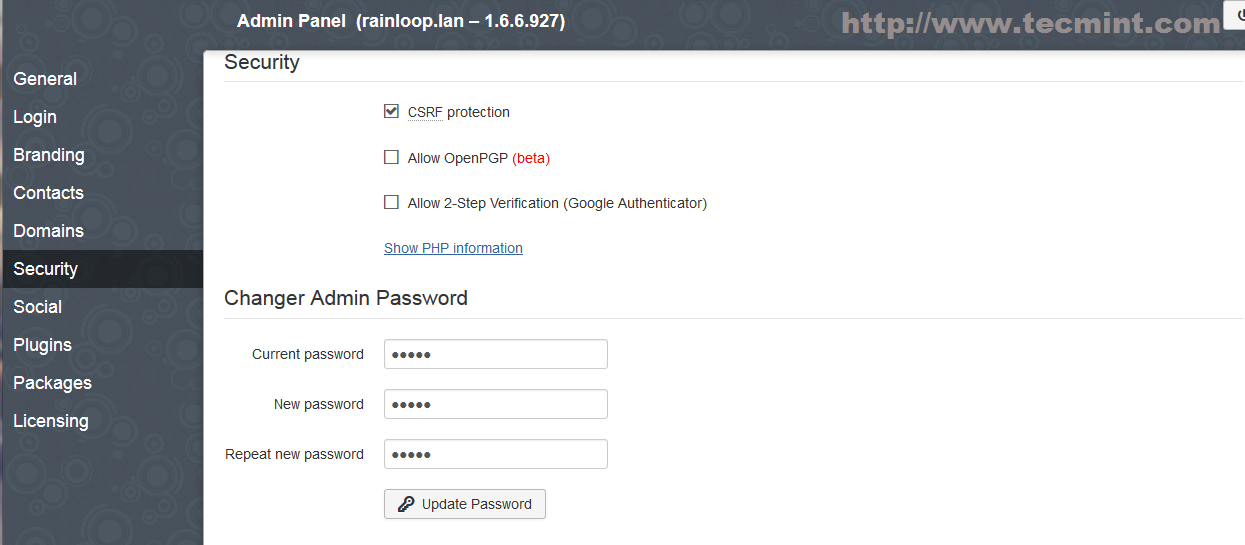
设置新的 Admin Password
12. 如果您要启用 Contact(联系人)功能,就登录到 MySQL 数据库并创建一个新的数据库及其用户,然后提供在Contacts 字段里面输入数据库信息。
- mysql –u root –p
- create database ifnot exists rainloop;
- create user rainloop_user@localhost identified by“password”;
- grant all privileges on rainloop.* to rainloop_user@localhost;
- flush privileges;
- exit;
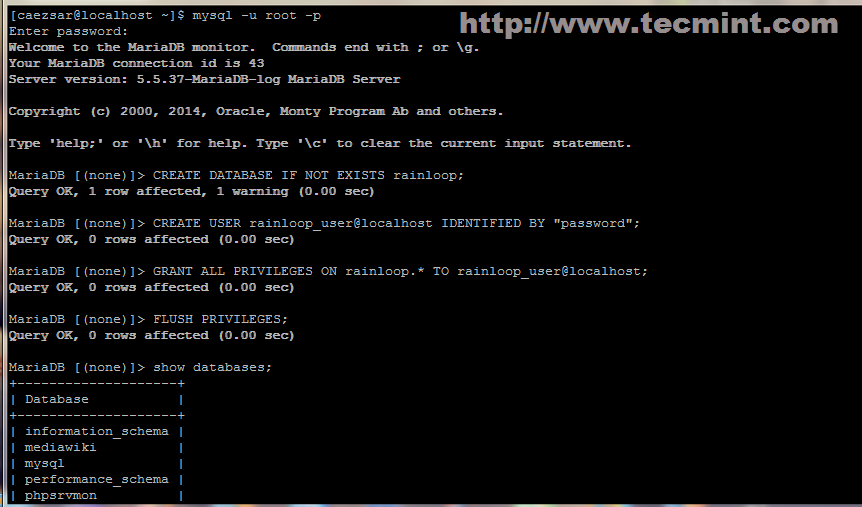
在 RainLoop 中激活联系人
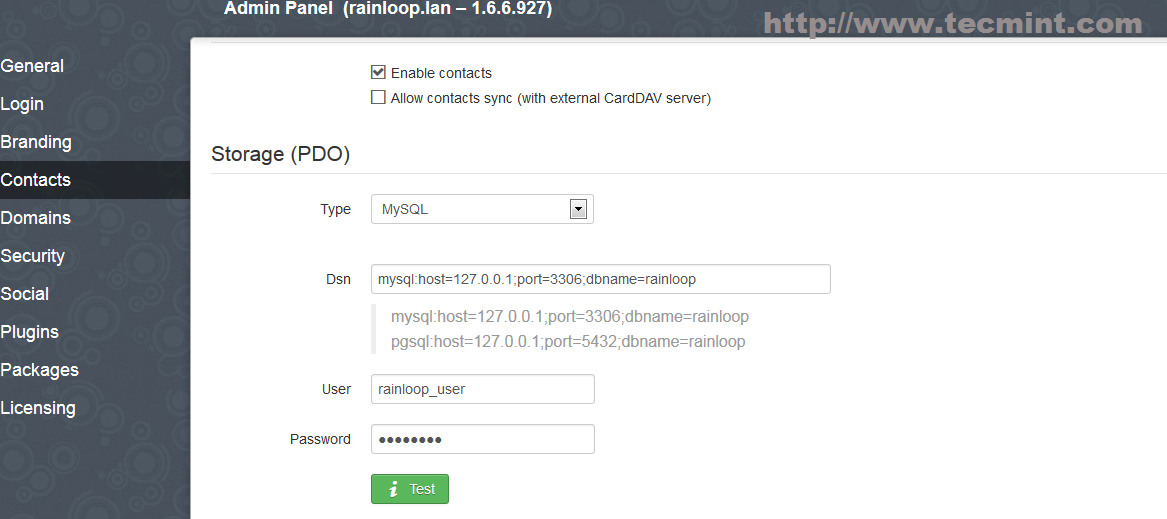
添加联系人数据库配置
13. 默认情况下 Rainloop 提供了 ** Gmail,Yahoo和Outlook** 的邮件服务器的配置文件,但是你如果愿意,你也可以添加其他的邮件服务器域。
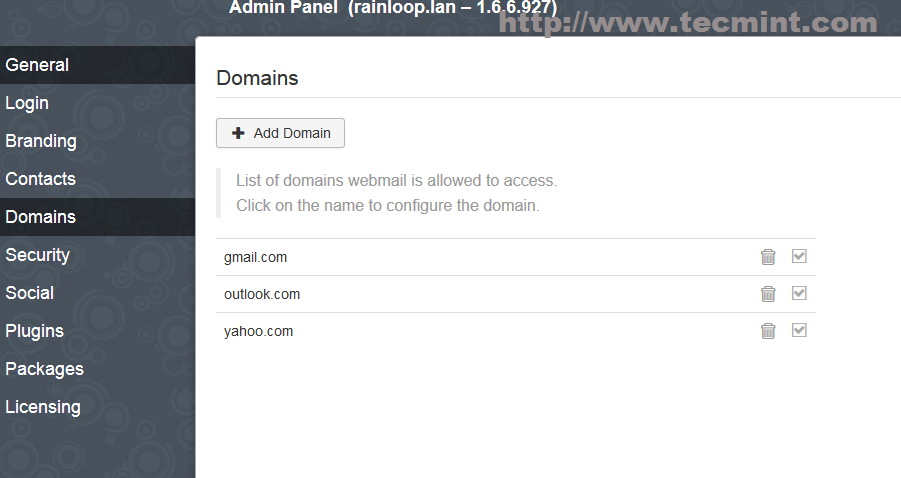
默认 Mail 域
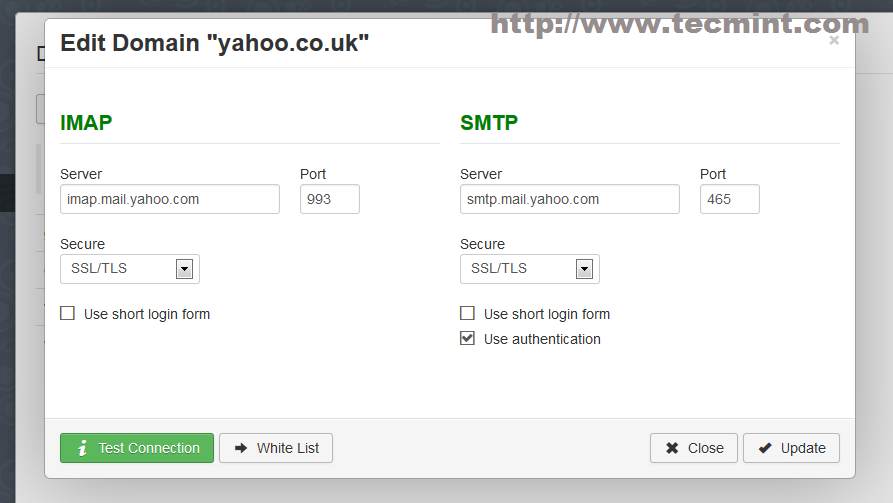
添加新域
14. 登录你的邮件服务器,访问 https://rainloop.lan,并提供您的域名服务器验证信息。
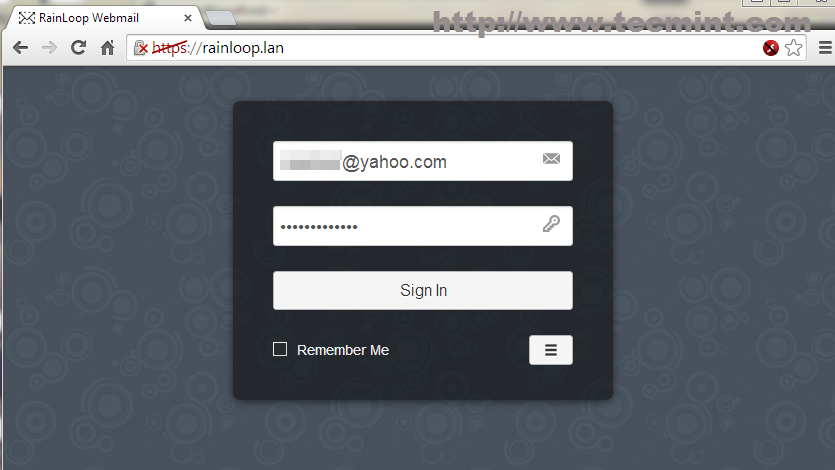
登录到 Yahoo 邮件页面
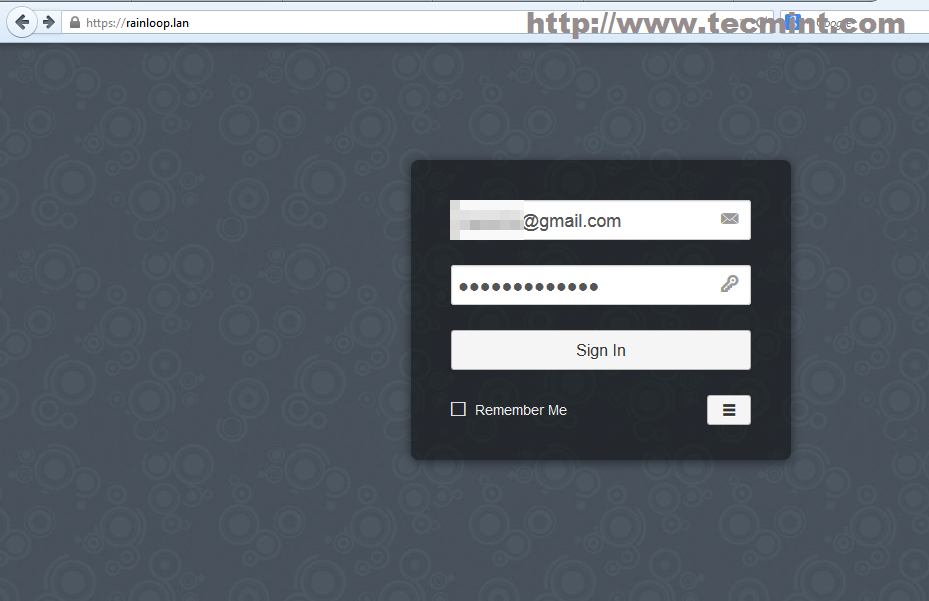
登录 Gmail
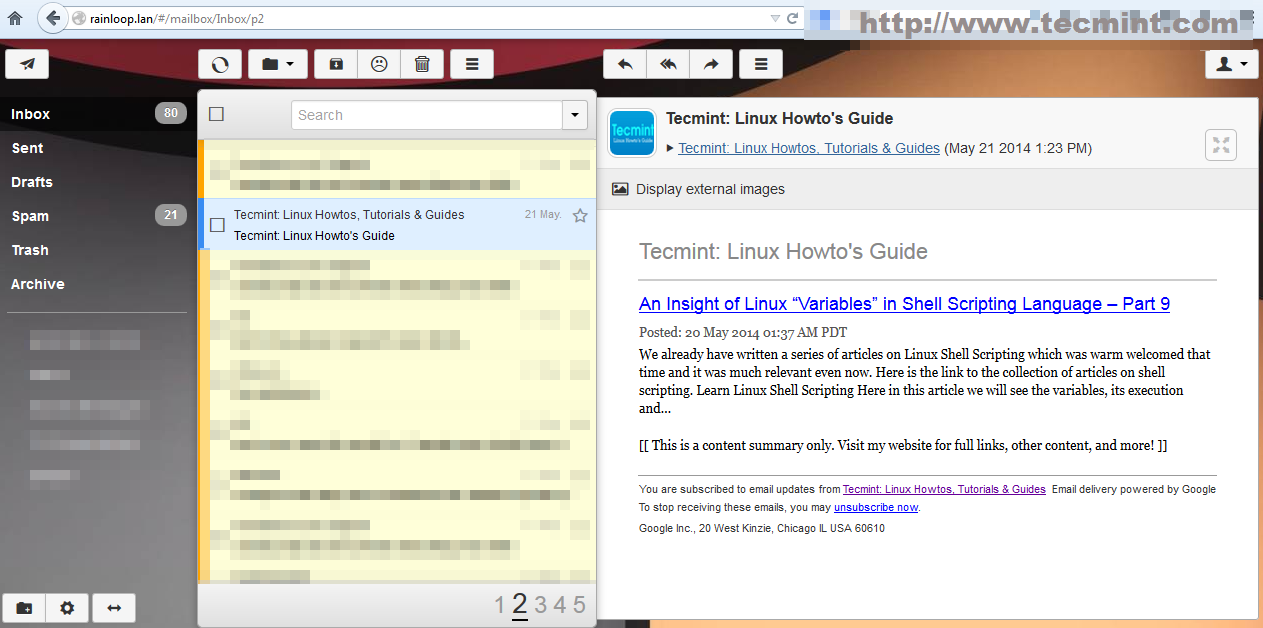
RainLoop 登录后的 Email 界面
想要了解更多的文件,可以访问:http://rainloop.net/docs/.
通过 Rainloop 你可以从浏览器中访问具有 Internet 连接的任何邮件服务器。唯一的缺憾就是在 Arch Linux 下使用 Rainloop 应用的话,少一个修改电子邮件帐户密码的 poppassd 插件包。
Rainloop 是一个使用 PHP 编写的,开源免费的网页邮件客户端。他支持包括 Google、Yahoo、OutLook 在内的主流的邮件服务器,当然,他也支持你自己的本地邮件服务器。它看起来大致就像使用 IMAP 和 SMTP 协议的 MUA(邮件客户端)一样。
RainLoop 示例
可以看一下 RainLoop 作者安装的演示页面:http://demo.rainloop.net/。

在 Arch Linux 上安装 RainLoop
一旦在您的服务器部署上 Rainloop,剩余要做的唯一的事情是通过 Web 浏览器访问您的 Rainloop,并提供你正在使用的邮件服务器信息。
本教程包含了在 Arch Linux上的Rainloop 网页客户端的安装流程,包括如何进行配置 Apache 或 Nginx, 当然本教程使用修改 Hosts 的方式,从而避免了 DNS 的访问。
If you also need references on installing Rainloop on Debian and Red Hat systems visit the previous RainLoop Webmail article at.
如果你还是需要一篇在Debian 和 Red Hat 安装 RainLoop Webmail 的教程,你可以看这篇文章:
- 在 Debian 和 RedHat 系的 Linux 上安装 RainLoop Webmail
以及在 Ubuntu 服务器中安装 RainLoop Webmail 的教程,你可以看这篇文章:
- 如何在 Ubuntu server 中设置 RainLoop Webmail
系统要求
对 Nginx
- LEMP 架构及应用部署——Nginx 延伸 http://www.linuxidc.com/Linux/2013-07/87548.htm
- CentOS 5.6+Nginx 1.0+PHP 5.3.6+MySQL 5.5.11 构建 LEMP(X64)平台 http://www.linuxidc.com/Linux/2011-07/38107.htm
对 Apache
Ubuntu 13.04 安装 LAMP\Vsftpd\Webmin\phpMyAdmin 服务及设置 http://www.linuxidc.com/Linux/2013-06/86250.htm
CentOS 5.9 下编译安装 LAMP(Apache 2.2.44+MySQL 5.6.10+PHP 5.4.12) http://www.linuxidc.com/Linux/2013-03/80333p3.htm
RedHat 5.4 下 Web 服务器架构之源码构建 LAMP 环境及应用 PHPWind http://www.linuxidc.com/Linux/2012-10/72484p2.htm
LAMP 源码环境搭建 WEB 服务器 Linux+Apache+MySQL+PHP http://www.linuxidc.com/Linux/2013-05/84882.htm
Step 1: 在 Nginx 或者 Apache 上创建虚拟主机
1. 假设你已经如上面介绍的链接所述,配置好了您的服务器(Nginx或 Apache),你需要做的第一件事是在 Hosts 文件里创建一个原始解析记录,以指向 的 Arch Linux系统的 IP。
对于 Linux 系统,修改 /etc/hosts 文件并且在你的 localhost 条目之下添加 Rainloop 的虚拟域。如下:
- 127.0.0.1 localhost.localdomain localhost rainloop.lan
- 192.168.1.33 rainloop.lan

添加域信息
如果是 Windows 系统,则修改 C:\Windows\System32\drivers\etc\hosts 并且将接下来的内容添加到你的文件里:
- 192.168.1.33 rainloop.lan
2. 使用 ping 命令确认本地的 Rainloop 域名创建成功之后,然后在 Apache 或 Nginx 中创建所需的 虚拟主机 和 SSL 配置。
Nginx 虚拟主机
在 /etc/nginx/sites-available/ 目录下使用如下命令创建一个名叫rainloop.lan 的文件:
- $ sudo nano /etc/nginx/sites–available/rainloop.conf
添加如下的文件内容:
- server {
- listen 80;
- server_name rainloop.lan;
- rewrite ^ https://$server_name$request_uri? permanent;
- access_log /var/log/nginx/rainloop.lan.access.log;
- error_log /var/log/nginx/rainloop.lan.error.log;
- root /srv/www/rainloop/;
- # serve static files
- location ~^/(images|javascript|js|css|flash|media|static)/{
- root /srv/www/rainloop/;
- expires 30d;
- }
- location /{
- index index.html index.htm index.php;
- autoindex on;
- autoindex_exact_size off;
- autoindex_localtime on;
- }
- location ^~/data {
- deny all;
- }
- location ~ \.php$ {
- #fastcgi_pass 127.0.0.1:9000; (depending on your php-fpm socket configuration)
- fastcgi_pass unix:/run/php–fpm/php–fpm.sock;
- fastcgi_index index.php;
- include fastcgi.conf;
- }
- }
接下来创建 SSL 配置文件:
- $ sudo nano /etc/nginx/sites–available/rainloop–ssl.conf
添加如下内容:
- server {
- listen 443 ssl;
- server_name rainloop.lan;
- ssl_certificate /etc/nginx/ssl/rainloop.lan.crt;
- ssl_certificate_key /etc/nginx/ssl/rainloop.lan.key;
- ssl_session_cache shared:SSL:1m;
- ssl_session_timeout 5m;
- ssl_ciphers HIGH:!aNULL:!MD5;
- ssl_prefer_server_ciphers on;
- access_log /var/log/nginx/rainloop.lan.access.log;
- error_log /var/log/nginx/rainloop.lan.error.log;
- root /srv/www/rainloop/;
- # serve static files
- location ~^/(images|javascript|js|css|flash|media|static)/{
- root /srv/www/rainloop/;
- expires 30d;
- }
- location ^~/data {
- deny all;
- }
- location /{
- index index.html index.htm index.php;
- autoindex on;
- autoindex_exact_size off;
- autoindex_localtime on;
- }
- location ~ \.php$ {
- #fastcgi_pass 127.0.0.1:9000; (depending on your php-fpm socket configuration)
- fastcgi_pass unix:/run/php–fpm/php–fpm.sock;
- fastcgi_index index.php;
- include fastcgi.conf;
- }
- }
接下来将会自动生成 Certificate 和Keys文件,然后在文件中叫Common Name* 的证书里中添加您的虚拟域名( rainloop.lan**)。
- $ sudo nginx_gen_ssl.sh

生成证书和密钥
生成证书和 SSL 密钥后,创建 Rainloop Web 服务器 根的文件路径(Rainloop PHP 文件所在的位置),然后启用虚拟主机,并重新启动 Nginx 的守护进程,应用配置。
- $ sudo mkdir –p /srv/www/rainloop
- $ sudo n2ensite rainloop
- $ sudo n2ensite rainloop–ssl
- $ sudo systemctl restart nginx

创建 RainLoop 网页向导
Apache 虚拟主机
在 /etc/httpd/conf/sites-available/ 中创建 rainloop.conf文件:
- $ sudo nano /etc/httpd/conf/sites–available/rainloop.conf
添加如下内容:
- <VirtualHost *:80>
- ServerName rainloop.lan
- DocumentRoot “/srv/www/rainloop/”
- ServerAdmin you@example.com
- ErrorLog “/var/log/httpd/rainloop-error_log”
- TransferLog “/var/log/httpd/rainloop-access_log”
- <Directory/>
- Options +Indexes +FollowSymLinks +ExecCGI
- AllowOverride All
- Order deny,allow
- Allow from all
- Require all granted
- </Directory>
- </VirtualHost>

创建 Apache 虚拟主机
为 Apache 添加 SSL 支持:
- $ sudo nano /etc/httpd/conf/sites–available/rainloop–ssl.conf
添加如下文件内容:
- <VirtualHost *:443>
- ServerName rainloop.lan
- DocumentRoot “/srv/www/rainloop/”
- ServerAdmin you@example.com
- ErrorLog “/var/log/httpd/rainloop-ssl-error_log”
- TransferLog “/var/log/httpd/rainloop-ssl-access_log”
- SSLEngine on
- SSLCertificateFile “/etc/httpd/conf/ssl/rainloop.lan.crt”
- SSLCertificateKeyFile “/etc/httpd/conf/ssl/rainloop.lan.key”
- <FilesMatch“\.(cgi|shtml|phtml|php)$”>
- SSLOptions +StdEnvVars
- </FilesMatch>
- BrowserMatch “MSIE [2-5]” \
- nokeepalive ssl-unclean-shutdown \
- downgrade-1.0 force-response-1.0
- CustomLog “/var/log/httpd/ssl_request_log” \
- “%t %h %{SSL_PROTOCOL}x %{SSL_CIPHER}x \”%r\” %b”
- <Directory/>
- Options +Indexes +FollowSymLinks +ExecCGI
- AllowOverride All
- Order deny,allow
- Allow from all
- Require all granted
- </Directory>
- </VirtualHost>
接下来将会自动生成 Certificate 和Keys文件,然后在文件中叫Common Name* 的证书里中添加您的虚拟域名( rainloop.lan**)。
- $ sudo apache_gen_ssl

创建 SSL 证书和密钥

输入组织信息
After the Certificate and SSL keys are created, add Rainloop DocumentRoot path, then enable Virtual Hosts and restart Apache daemon to apply configurations. 在证书和密钥建立之后,创建 RainLoop 的 DocumentRoot 所指向的目录,之后激活虚拟主机,并且重启 Apache 应用设置。
- $ sudo mkdir –p /srv/www/rainloop
- $ sudo a2ensite rainloop
- $ sudo a2ensite rainloop–ssl
- $ sudo systemctl restart httpd

激活虚拟主机
更多详情见请继续阅读下一页的精彩内容:http://www.linuxidc.com/Linux/2014-06/103463p2.htm


