")

共计 46612 个字符,预计需要花费 117 分钟才能阅读完成。
简介
Nagios 是一款自动化运维工具,可以协助运维人员监控服务器的运行状况,并且拥有报警功能。本文章将介绍其安装方法和详细的配置方法。
nagios 监控服务应用指南
本地资源:负载,CPU,磁盘,内存。IO,RAID,温度,passwd 文件变化,本地所有文件指纹识别
网络服务:端口,URL,丢包,进程,网络流量
其他设备:交换机,打印机,windows 等。
业务数据:用户登录失败次数,用户登录网站次数,输入验证码失败的次数,某个 API 接口流量并发,电商网站订单,支付交易的数量nagios 成员:主程序 nagios,插件 nagios-plugins,和一些可选的客户端 nrpe,NSClient++,NSCA 和 NDOUtils
NRPE– 半被动模式
存放位置:安装在客户端
NRPE 作用:在客户端执行相关的脚本插件来获取数据,实现对客户端主机资源的监控。
存在形式:守护进程 (agent) 模式,开启的端口 5666NSClient++:半被动模式,相当于 linux 系统的 nrpe
NDOUtils(不推荐用)
存在位置:服务端
作用:用于将 nagios 的配置信息和各 event 产生的数据存入数据库中,以实现对这些数据的检索和处理。NSCA:纯被动模式 —> 用在分布式监控环境中
位置:NSCA 需要同时安装在 nagios 的服务器端和客户端
软件版本
nagios 版本:4.3.1
nagios-plugins 版本:2.2.1
nrpe 版本:3.1.0
实现环境
nagios 运行在 LAMP 环境下(如果还没有安装 LAMP 环境,可以参考下我的安装 LNMP 文章 http://www.linuxidc.com/Linux/2017-10/147581.htm,因为我已经编译安装了 php 和 Mysql,本文直接采取 yum 方式安装 apache,当然也可以采取编译方式安装 apache。看个人喜好和公司需求)
CentOS 版本:CentOS Linux release 7.3.1611 (Core) 64 位
Apache 版本:Apache/2.4.6
Nginx 版本: nginx 1.12.0
Mysql 版本:mysql 5.7.18
PHP 版本:php 7.1.4
下载 nagios 软件及插件包
[root@nagios ~]# cd /software/
[root@nagios software]# wget https://assets.nagios.com/downloads/nagioscore/releases/nagios-4.3.1.tar.gz
[root@nagios software]# wget https://nagios-plugins.org/download/nagios-plugins-2.2.1.tar.gz
[root@nagios software]# wget https://sourceforge.net/projects/nagios/files/nrpe-3.x/nrpe-3.1.0.tar.gz
[root@nagios software]# ll
-rw-r--r--   1 root  root  11095797 4 月  21 15:57 nagios-4.3.1.tar.gz
-rw-r--r--   1 root  root   2728818 4 月  20 00:04 nagios-plugins-2.2.1.tar.gz
-rw-r--r--   1 root  root    501028 4 月  17 22:36 nrpe-3.1.0.tar.gz
安装 nagios-server 服务端
安装依赖包
[root@nagios software]# yum -y install httpd httpd-devel gcc glibc glibc-common gd gd-devel perl-devel perl-CPAN fcgi perl-FCGI perl-FCGI-ProcManager解压 nagios 源码包
[root@nagios software]# tar zxvf nagios-4.3.1.tar.gz进入解压后的目录
[root@nagios software]# cd nagios-4.3.1/创建 ngaios 用户和组(把 nginx 启动用户 www 加入到 nagios 相关组)
[root@nagios nagios-4.3.1]# useradd nagios -s /sbin/nologin
[root@nagios nagios-4.3.1]# id www
[root@nagios nagios-4.3.1]# groupadd nagcmd
[root@nagios nagios-4.3.1]# usermod -a -G nagcmd nagios
[root@nagios nagios-4.3.1]# usermod -a -G nagcmd www
[root@nagios nagios-4.3.1]# id -n -G nagios
[root@nagios nagios-4.3.1]# id -n -G www
配置 nagios
[root@client1 nagios-4.3.1]# ./configure --with-command-group=nagcmd编译和安装
[root@nagios nagios-4.3.1]# make all
[root@nagios nagios-4.3.1]# make install-init
[root@nagios nagios-4.3.1]# make install-commandmode
[root@nagios nagios-4.3.1]# make install-config
[root@nagios nagios-4.3.1]# make install
[root@nagios nagios-4.3.1]# cp -R contrib/eventhandlers/ /usr/local/nagios/libexec/
[root@nagios nagios-4.3.1]# chown -R nagios:nagios /usr/local/nagios/libexec/eventhandlers
[root@nagios nagios-4.3.1]# /usr/local/nagios/bin/nagios -v /usr/local/nagios/etc/nagios.cfg
生成 apache 配置文件
[root@nagios nagios-4.3.1]# make install-webconf
/usr/bin/install -c -m 644 sample-config/httpd.conf /etc/httpd/conf.d/nagios.conf
if [0 -eq 1]; then \
    ln -s /etc/httpd/conf.d/nagios.conf /etc/apache2/sites-enabled/nagios.conf; \
fi

*** Nagios/Apache conf file installed ***
生成 nagios web 界面的验证信息
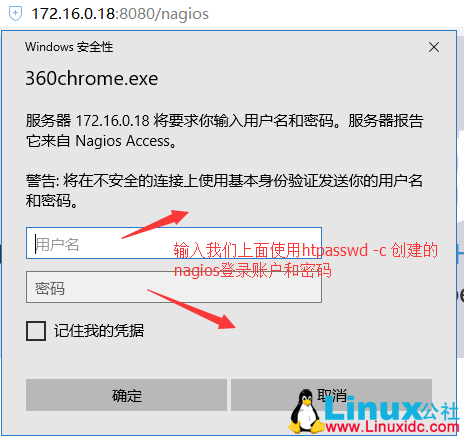
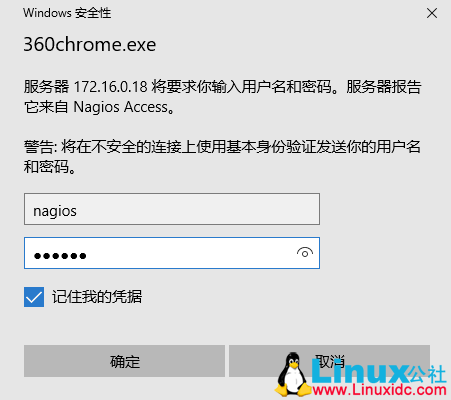
[root@nagios nagios-4.3.1]# htpasswd -c /usr/local/nagios/etc/htpasswd.users nagios
New password:   ==> 输入密码,这里我输入的密码是 nagios,记住这个密码
Re-type new password:  ==> 确认密码
Adding password for user nagios
修改 apache 配置文件
vi /etc/httpd/conf/httpd.conf
Listen 80    ===>    修改为    Listen 8080
User apache    ===>    修改为    User www
Group apache    ===>    修改为    Group www
DirectoryIndex index.html    ===>    修改为    DirectoryIndex index.php index.html
AddType application/x-gzip .gz .tgz    ===>    下面添加一行内容  AddHandler application/x-httpd-php .php
# LoadModule foo_module modules/mod_foo.so    ===>    下面添加一行内容
 LoadModule php7_module        modules/libphp7.so
apache 配置文件参考
[root@nagios httpd]# grep -v '^$' /etc/httpd/conf/httpd.conf|grep -v '#'
ServerRoot "/etc/httpd"
Listen 8080
LoadModule php7_module        modules/libphp7.so
Include conf.modules.d/*.conf
User www
Group www
ServerAdmin root@localhost
<Directory />
    AllowOverride none
    Require all denied
</Directory>
DocumentRoot "/var/www/html"
<Directory "/var/www">
    AllowOverride None
    Require all granted
</Directory>
<Directory "/var/www/html">
    Options Indexes FollowSymLinks
    AllowOverride None
    Require all granted
</Directory>
<IfModule dir_module>
    DirectoryIndex index.php index.html
</IfModule>
<Files ".ht*">
    Require all denied
</Files>
ErrorLog "logs/error_log"
LogLevel warn
<IfModule log_config_module>
    LogFormat "%h %l %u %t \"%r\"%>s %b \"%{Referer}i\"\"%{User-Agent}i\"" combined
    LogFormat "%h %l %u %t \"%r\"%>s %b" common
    <IfModule logio_module>
      LogFormat "%h %l %u %t \"%r\"%>s %b \"%{Referer}i\"\"%{User-Agent}i\"%I %O" combinedio
    </IfModule>
    CustomLog "logs/access_log" combined
</IfModule>
<IfModule alias_module>
    ScriptAlias /cgi-bin/ "/var/www/cgi-bin/"
</IfModule>
<Directory "/var/www/cgi-bin">
    AllowOverride None
    Options None
    Require all granted
</Directory>
<IfModule mime_module>
    TypesConfig /etc/mime.types
    AddType application/x-compress .Z
    AddType application/x-gzip .gz .tgz
    AddHandler application/x-httpd-php .php
    AddType text/html .shtml
    AddOutputFilter INCLUDES .shtml
</IfModule>
AddDefaultCharset UTF-8
<IfModule mime_magic_module>
    MIMEMagicFile conf/magic
</IfModule>
EnableSendfile on
IncludeOptional conf.d/*.conf
重新编译一下 php,使其直接 apache(也就是编译参数加上 –with-apxs2)
[root@nagios nagios-4.3.1]# cd /software/php-7.1.4/
[root@nagios php-7.1.4]# ./configure --prefix=/usr/local/php --enable-fpm --with-fpm-user=nginx --with-fpm-group=nginx --with-mysqli --with-zlib --with-curl --with-gd --with-jpeg-dir --with-png-dir --with-freetype-dir --with-openssl --enable-mbstring --enable-xml --enable-session --enable-ftp --enable-pdo -enable-tokenizer --enable-zip --with-apxs2
[root@nagios php-7.1.4]# make && make install
[root@nagios php-7.1.4]# cd /etc/httpd/
[root@nagios httpd]# ll /etc/httpd/modules/libphp7.so
-rwxr-xr-x 1 root root 38908880 4 月  24 10:34 /etc/httpd/modules/libphp7.so    ===>    可以看到这个模块已经生成
启动 apache
[root@nagios httpd]# systemctl start httpd
[root@nagios httpd]# systemctl enable httpd
启动 nagios
chkconfig nagios on
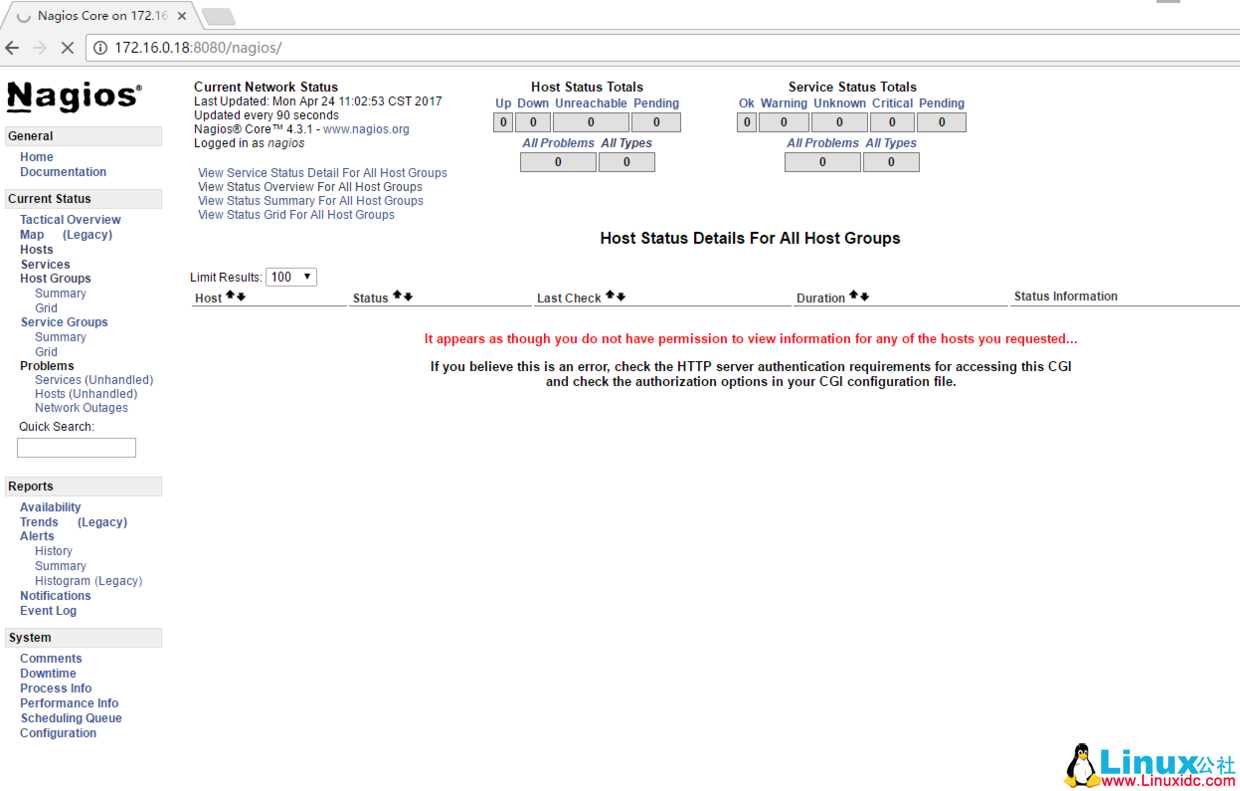
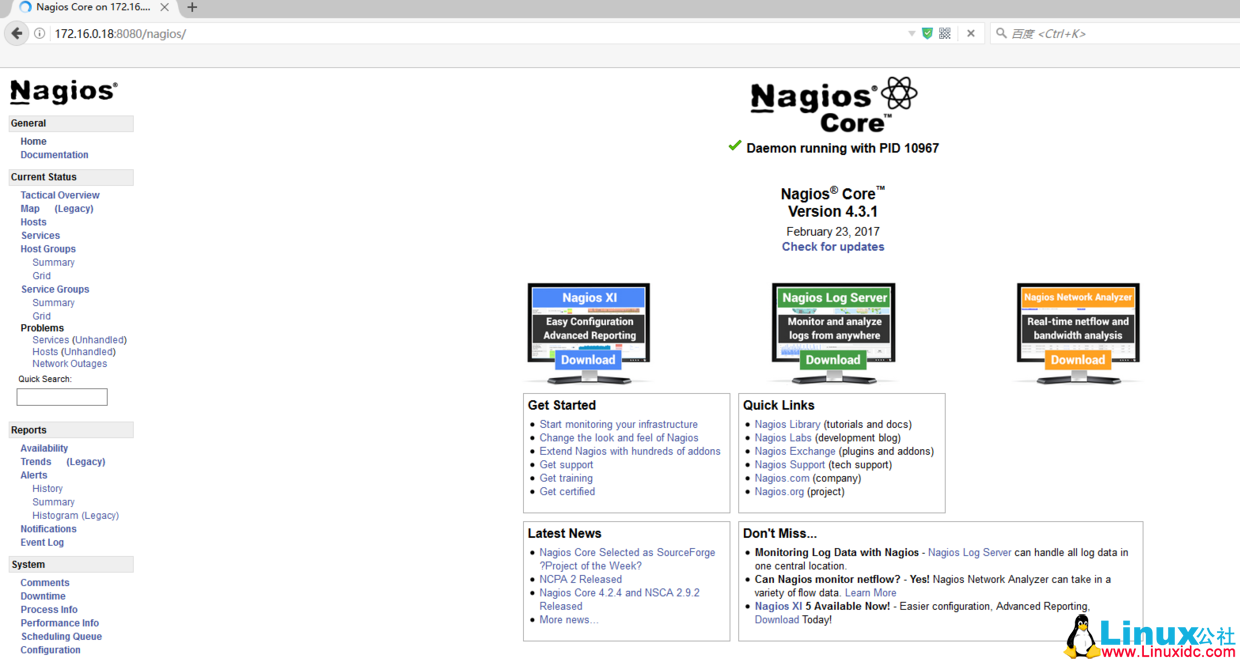
/etc/init.d/nagios start在浏览器输入 ip:8080/nagios 测试 nagios-web 页面是否可以打开
安装 nagios-plugins 插件
解压 nagios-plugins 源码包
[root@nagios httpd]# cd /software/
[root@nagios software]# tar zxvf nagios-plugins-2.2.1.tar.gz
进入解压后的目录进行配置
[root@nagios software]# cd nagios-plugins-2.2.1/
[root@nagios nagios-plugins-2.2.1]# ./configure --with-nagios-user=nagios --with-nagios-group=nagcmd --enable-perl-modules
编译及安装
[root@nagios nagios-plugins-2.2.1]# make && make install安装 nrpe
解压 nrpe 源码包
[root@nagios nagios-plugins-2.2.1]# cd /software/
[root@nagios software]# tar zxvf nrpe-3.1.0.tar.gz
进去解压后的目录进行配置
[root@nagios software]# cd nrpe-3.1.0/
[root@nagios nrpe-3.1.0]# ./configure
编译及安装
[root@nagios nrpe-3.1.0]# make all
[root@nagios nrpe-3.1.0]# make install-plugin
[root@nagios nrpe-3.1.0]# make install-daemon
[root@nagios nrpe-3.1.0]# make install-daemon-config
[root@nagios nrpe-3.1.0]# cp sample-config/nrpe.cfg /usr/local/nagios/etc/nrpe.cfg
安装完成后,查看下 libexec 下面是否有插件
[root@nagios nrpe-3.1.0]# ls /usr/local/nagios/libexec/
check_apt       check_flexlm        check_log          check_ntp_peer  check_smtp    disable_active_service_checks
check_breeze    check_fping         check_mailq        check_ntp_time  check_spop    disable_notifications
check_by_ssh    check_ftp           check_mrtg         check_nwstat    check_ssh     distributed-monitoring
check_clamd     check_http          check_mrtgtraf     check_Oracle    check_ssmtp   enable_active_service_checks
check_cluster   check_icmp          check_mysql        check_overcr    check_swap    enable_notifications
check_dhcp      check_ide_smart     check_mysql_query  check_ping      check_tcp     eventhandlers
check_dig       check_ifoperstatus  check_nagios       check_pop       check_time    negate
check_disk      check_ifstatus      check_nntp         check_procs     check_udp     redundancy-scenario1
check_disk_smb  check_imap          check_nntps        check_real      check_ups     submit_check_result
check_dns       check_ircd          check_nrpe         check_rpc       check_uptime  urlize
check_dummy     check_jabber        check_nt           check_sensors   check_users   utils.pm
check_file_age  check_load          check_ntp          check_simap     check_wave    utils.sh
启动 nrpe,并测试服务端本地是否可以连通
[root@nagios nrpe-3.1.0]# /usr/local/nagios/bin/nrpe -d -c /usr/local/nagios/etc/nrpe.cfg
[root@nagios nrpe-3.1.0]# echo "/usr/local/nagios/bin/nrpe -d -c /usr/local/nagios/etc/nrpe.cfg" >> /etc/rc.local
[root@nagios nrpe-3.1.0]# chmod +x /etc/rc.d/rc.local           # centos 7 下需要这一步,不然 /etc/rc.local 中的内容开机可能不执行
[root@nagios nrpe-3.1.0]# netstat -lnput|grep 5666
tcp        0      0 0.0.0.0:5666            0.0.0.0:*               LISTEN      67176/nrpe
tcp6       0      0 :::5666                 :::*                    LISTEN      67176/nrpe
[root@nagios nrpe-3.1.0]# /usr/local/nagios/libexec/check_nrpe -H localhost
NRPE v3.1.0-rc1更多详情见请继续阅读下一页的精彩内容:http://www.linuxidc.com/Linux/2017-10/147580p2.htm
nagios 客户端的安装
下载 nagios-plugin 和 nrpe 插件
[root@client1 ~]# mkdir /software/
[root@client1 ~]# cd /software/
[root@client1 software]# wget https://nagios-plugins.org/download/nagios-plugins-2.2.1.tar.gz
[root@client1 software]# wget https://sourceforge.net/projects/nagios/files/nrpe-3.x/nrpe-3.1.0.tar.gz
安装 nagios-plugin
安装依赖包
[root@client1 software]# yum install perl-devel perl-CPAN -y创建用户
[root@client1 software]# useradd nagios -M -s /sbin/nologin解压 nagios-plugin 源码包
[root@client1 software]# tar zxvf nagios-plugins-2.2.1.tar.gz进入解压后的目录进行配置
[root@client1 software]# cd nagios-plugins-2.2.1/
[root@client1 nagios-plugins-2.2.1]# ./configure --with-nagios-user=nagios --with-nagios-group=nagios --enable-perl-modules
编译及安装
[root@client1 nagios-plugins-2.2.1]# make && make install安装 nrpe 插件
解压 nrpe 源码包
[root@client1 nagios-plugins-2.2.1]# cd ..
[root@client1 software]# tar zxvf nrpe-3.1.0.tar.gz
进入解压后的目录进行配置
[root@client1 software]# cd nrpe-3.1.0/
[root@client1 nrpe-3.1.0]# ./configure
编译及安装
[root@client1 nrpe-3.1.0]# make all
[root@client1 nrpe-3.1.0]# make install-plugin
[root@client1 nrpe-3.1.0]# make install-daemon
[root@client1 nrpe-3.1.0]# make install-daemon-config
[root@client1 nrpe-3.1.0]# mkdir /usr/local/nagios/etc/
[root@client1 nrpe-3.1.0]# cp sample-config/nrpe.cfg /usr/local/nagios/etc/nrpe.cfg
安装完成后,查看下 libexec 下面是否有插件
[root@client1 nrpe-3.1.0]# ls /usr/local/nagios/libexec/
check_apt       check_dummy         check_imap         check_nagios    check_overcr   check_ssh     negate
check_breeze    check_file_age      check_ircd         check_nntp      check_ping     check_ssmtp   urlize
check_by_ssh    check_flexlm        check_jabber       check_nntps     check_pop      check_swap    utils.pm
check_clamd     check_fping         check_load         check_nrpe      check_procs    check_tcp     utils.sh
check_cluster   check_ftp           check_log          check_nt        check_real     check_time
check_dhcp      check_http          check_mailq        check_ntp       check_rpc      check_udp
check_dig       check_icmp          check_mrtg         check_ntp_peer  check_sensors  check_ups
check_disk      check_ide_smart     check_mrtgtraf     check_ntp_time  check_simap    check_uptime
check_disk_smb  check_ifoperstatus  check_mysql        check_nwstat    check_smtp     check_users
check_dns       check_ifstatus      check_mysql_query  check_Oracle    check_spop     check_wave
启动 nrpe,并测试服务端本地是否可以连通
[root@client1 nrpe-3.1.0]# /usr/local/nagios/bin/nrpe -d -c /usr/local/nagios/etc/nrpe.cfg
[root@client1 nrpe-3.1.0]# echo "/usr/local/nagios/bin/nrpe -d -c /usr/local/nagios/etc/nrpe.cfg" >> /etc/rc.local
[root@client1 nrpe-3.1.0]# chmod +x /etc/rc.d/rc.local           # CentOS 7 下需要这一步,不然 /etc/rc.local 中的内容开机可能不执行
[root@client1 nrpe-3.1.0]# netstat -lnput|grep 5666
tcp        0      0 0.0.0.0:5666            0.0.0.0:*               LISTEN      28296/nrpe
tcp6       0      0 :::5666                 :::*                    LISTEN      28296/nrpe
[root@client1 nrpe-3.1.0]# /usr/local/nagios/libexec/check_nrpe -H localhost
NRPE v3.1.0-rc1
修改配置文件
[root@client1 nrpe-3.1.0]# cd /usr/local/nagios/etc/vi nrpe.cfg
允许服务端 IP 和本机访问,172.16.0.18 是 nagios 服务端 IP 地址
allowed_hosts=127.0.0.1,::1 ===> 修改为 allowed_hosts=127.0.0.1,::1,172.16.0.18注释下面几行内容
command[check_users]=/usr/local/nagios/libexec/check_users -w 5 -c 10
command[check_load]=/usr/local/nagios/libexec/check_load -r -w .15,.10,.05 -c .30,.25,.20
command[check_hda1]=/usr/local/nagios/libexec/check_disk -w 20% -c 10% -p /dev/hda1
command[check_zombie_procs]=/usr/local/nagios/libexec/check_procs -w 5 -c 10 -s Z
command[check_total_procs]=/usr/local/nagios/libexec/check_procs -w 150 -c 200
在 nrpe.cfg 文件末尾增加下面几行内容
# my custom monitor items
command[check_users]=/usr/local/nagios/libexec/check_users -w 5 -c 10
command[check_load]=/usr/local/nagios/libexec/check_load -r -w .15,.10,.05 -c .30,.25,.20
command[check_disk]=/usr/local/nagios/libexec/check_disk -w 20% -c 10% -p /
command[check_mem]=/usr/local/nagios/libexec/check_mem.pl -w 90% -c 95%
command[check_swap]=/usr/local/nagios/libexec/check_swap -w 20% -c 10%
创建一个监控内存的 perl 脚本
[root@client1 etc]# vi /usr/local/nagios/libexec/check_mem.pl添加下面内容
#! /usr/bin/perl -w
#
# $Id: check_mem.pl 8 2008-08-23 08:59:52Z rhomann $
#
# check_mem v1.7 plugin for nagios
#
# uses the output of `free` to find the percentage of memory used
#
# Copyright Notice: GPL
#
# History:
# v1.8 Rouven Homann - rouven.homann@cimt.de
# + added findbin patch from Duane Toler
# + added backward compatibility patch from Timour Ezeev
#
# v1.7 Ingo Lantschner - ingo AT boxbe DOT com
# + adapted for systems with no swap (avoiding divison through 0)
#
# v1.6 Cedric Temple - cedric DOT temple AT cedrictemple DOT info
# + add swap monitoring
#       + if warning and critical threshold are 0, exit with OK
#       + add a directive to exclude/include buffers
#
# v1.5 Rouven Homann - rouven.homann@cimt.de
# + perfomance tweak with free -mt (just one sub process started instead of 7)
# + more code cleanup
#
# v1.4 Garrett Honeycutt - gh@3gupload.com
# + Fixed PerfData output to adhere to standards and show crit/warn values
#
# v1.3 Rouven Homann - rouven.homann@cimt.de
#   + Memory installed, used and free displayed in verbose mode
# + Bit Code Cleanup
#
# v1.2 Rouven Homann - rouven.homann@cimt.de
# + Bug fixed where verbose output was required (nrpe2)
#       + Bug fixed where perfomance data was not displayed at verbose output
# + FindBin Module used for the nagios plugin path of the utils.pm
#
# v1.1 Rouven Homann - rouven.homann@cimt.de
#     + Status Support (-c, -w)
# + Syntax Help Informations (-h)
#       + Version Informations Output (-V)
# + Verbose Output (-v)
#       + Better Error Code Output (as described in plugin guideline)
#
# v1.0 Garrett Honeycutt - gh@3gupload.com
#   + Initial Release
#
use strict;
use FindBin;
FindBin::again();
use lib $FindBin::Bin;
use utils qw($TIMEOUT %ERRORS &print_revision &support);
use vars qw($PROGNAME $PROGVER);
use Getopt::Long;
use vars qw($opt_V $opt_h $verbose $opt_w $opt_c);

$PROGNAME = "check_mem";
$PROGVER = "1.8";

# add a directive to exclude buffers:
my $DONT_INCLUDE_BUFFERS = 0;

sub print_help ();
sub print_usage ();

Getopt::Long::Configure('bundling');
GetOptions ("V"   => \$opt_V, "version"    => \$opt_V,
  "h"   => \$opt_h, "help"       => \$opt_h,
        "v" => \$verbose, "verbose"  => \$verbose,
  "w=s" => \$opt_w, "warning=s"  => \$opt_w,
  "c=s" => \$opt_c, "critical=s" => \$opt_c);

if ($opt_V) {print_revision($PROGNAME,'$Revision:'.$PROGVER.'$');
  exit $ERRORS{'UNKNOWN'};
}

if ($opt_h) {print_help();
  exit $ERRORS{'UNKNOWN'};
}

print_usage() unless (($opt_c) && ($opt_w));

my ($mem_critical, $swap_critical);
my ($mem_warning, $swap_warning);
($mem_critical, $swap_critical) = ($1,$2) if ($opt_c =~ /([0-9]+)[%]?(?:,([0-9]+)[%]?)?/);
($mem_warning, $swap_warning)   = ($1,$2) if ($opt_w =~ /([0-9]+)[%]?(?:,([0-9]+)[%]?)?/);

# Check if swap params were supplied
$swap_critical ||= 100;
$swap_warning  ||= 100;

# print threshold in output message
my $mem_threshold_output = "(";
my $swap_threshold_output = "(";

if ($mem_warning > 0 && $mem_critical > 0) {$mem_threshold_output .= "W> $mem_warning, C> $mem_critical";}
elsif ($mem_warning > 0) {$mem_threshold_output .= "W> $mem_warning";}
elsif ($mem_critical > 0) {$mem_threshold_output .= "C> $mem_critical";}

if ($swap_warning > 0 && $swap_critical > 0) {$swap_threshold_output .= "W> $swap_warning, C> $swap_critical";}
elsif ($swap_warning > 0) {$swap_threshold_output .= "W> $swap_warning";}
elsif ($swap_critical > 0)  {$swap_threshold_output .= "C> $swap_critical";}

$mem_threshold_output .= ")";
$swap_threshold_output .= ")";

my $verbose = $verbose;

my ($mem_percent, $mem_total, $mem_used, $swap_percent, $swap_total, $swap_used) = &sys_stats();
my $free_mem = $mem_total - $mem_used;
my $free_swap = $swap_total - $swap_used;

# set output message
my $output = "Memory Usage".$mem_threshold_output.":". $mem_percent.'% <br>';
$output .= "Swap Usage".$swap_threshold_output.":". $swap_percent.'%';

# set verbose output message
my $verbose_output = "Memory Usage:".$mem_threshold_output.":". $mem_percent.'%'."- Total: $mem_total MB, used: $mem_used MB, free: $free_mem MB<br>";
$verbose_output .= "Swap Usage:".$swap_threshold_output.":". $swap_percent.'%'."- Total: $swap_total MB, used: $swap_used MB, free: $free_swap MB<br>";

# set perfdata message
my $perfdata_output = "MemUsed=$mem_percent\%;$mem_warning;$mem_critical";
$perfdata_output .= "SwapUsed=$swap_percent\%;$swap_warning;$swap_critical";


# if threshold are 0, exit with OK
if ($mem_warning == 0) {$mem_warning = 101};
if ($swap_warning == 0) {$swap_warning = 101};
if ($mem_critical == 0) {$mem_critical = 101};
if ($swap_critical == 0) {$swap_critical = 101};


if ($mem_percent>$mem_critical || $swap_percent>$swap_critical) {if ($verbose) {print "<b>CRITICAL:".$verbose_output."</b>|".$perfdata_output."\n";}
    else {print "<b>CRITICAL:".$output."</b>|".$perfdata_output."\n";}
    exit $ERRORS{'CRITICAL'};
} elsif ($mem_percent>$mem_warning || $swap_percent>$swap_warning) {if ($verbose) {print "<b>WARNING:".$verbose_output."</b>|".$perfdata_output."\n";}
    else {print "<b>WARNING:".$output."</b>|".$perfdata_output."\n";}
    exit $ERRORS{'WARNING'};
} else {if ($verbose) {print "OK:".$verbose_output."|".$perfdata_output."\n";}
    else {print "OK:".$output."|".$perfdata_output."\n";}
    exit $ERRORS{'OK'};
}

sub sys_stats {my @memory = split(" ", `free -mt`);
    my $mem_total = $memory[7];
    my $mem_used;
    if ($DONT_INCLUDE_BUFFERS) {$mem_used = $memory[15]; }
    else {$mem_used = $memory[8];}
    my $swap_total = $memory[18];
    my $swap_used = $memory[19];
    my $mem_percent = ($mem_used / $mem_total) * 100;
    my $swap_percent;
    if ($swap_total == 0) {$swap_percent = 0;} else {$swap_percent = ($swap_used / $swap_total) * 100;
    }
    return (sprintf("%.0f",$mem_percent),$mem_total,$mem_used, sprintf("%.0f",$swap_percent),$swap_total,$swap_used);
}

sub print_usage () {print "Usage: $PROGNAME -w <warn> -c <crit> [-v] [-h]\n";
    exit $ERRORS{'UNKNOWN'} unless ($opt_h);
}

sub print_help () {print_revision($PROGNAME,'$Revision:'.$PROGVER.'$');
    print "Copyright (c) 2005 Garrett Honeycutt/Rouven Homann/Cedric Temple\n";
    print "\n";
    print_usage();
    print "\n";
    print "-w <MemoryWarn>,<SwapWarn> = Memory and Swap usage to activate a warning message (eg: -w 90,25) .\n";
    print "-c <MemoryCrit>,<SwapCrit> = Memory and Swap usage to activate a critical message (eg: -c 95,50).\n";
    print "-v = Verbose Output.\n";
    print "-h = This screen.\n\n";
    support();}
给脚本增加执行权限
[root@client1 etc]# chmod 755 /usr/local/nagios/libexec/check_mem.pl重启 nrpe 服务
# 方法一
[root@client1 etc]# killall nrpe
[root@client1 etc]# /usr/local/nagios/bin/nrpe -d -c /usr/local/nagios/etc/nrpe.cfg
# 方法二
[root@client1 etc]# kill -HUP `ps -ef|grep nrpe|awk 'NR==1{print $2}'`
在本机执行两个命令看下效果
[root@client1 etc]# /usr/local/nagios/libexec/check_nrpe -H localhost -c check_mem
<b>CRITICAL: Memory Usage (W> 10, C> 3): 29% <br>Swap Usage (W> 100, C> 100): 12%</b>|MemUsed=29%;10;3 SwapUsed=12%;100;100
[root@client1 etc]# /usr/local/nagios/libexec/check_nrpe -H localhost -c check_disk
DISK OK - free space: / 4201 MB (24.15% inode=97%);| /=13192MB;13915;15654;0;17394
服务端配置
nrpe 连接客户端机器测试是否可以连通,然后执行一个监控命令(如果不通的话可能是因为 selinux 和防火墙没关闭而造成的)
[root@nagios nrpe-3.1.0]# /usr/local/nagios/libexec/check_nrpe -H 172.16.0.20
NRPE v3.1.0-rc1
[root@nagios nrpe-3.1.0]# /usr/local/nagios/libexec/check_nrpe -H 172.16.0.20 -c check_disk
DISK OK - free space: / 4201 MB (24.15% inode=97%);| /=13192MB;13915;15654;0;17394
因为 nagios 默认把全部的权限给 nagiosadmin,所以可以通过修改 cgi.cfg 文件赋予 nagios 权限,切换到 /usr/local/nagios/etc 目录下
[root@nagios nrpe-3.1.0]# cd /usr/local/nagios/etc
[root@nagios etc]# ll
总用量 144
-rw-rw-r-- 1 nagios nagios 12999 4 月  21 17:00 cgi.cfg
-rw-r--r-- 1 root   root      45 4 月  24 09:28 htpasswd.users
-rw-rw-r-- 1 nagios nagios 44831 4 月  21 17:00 nagios.cfg
-rw-r--r-- 1 root   root   10765 4 月  24 12:32 nrpe.cfg
drwxrwxr-x 2 nagios nagios   336 4 月  21 17:00 objects
-rw-rw---- 1 nagios nagios  1312 4 月  21 17:00 resource.cfg
[root@nagios etc]# grep nagiosadmin cgi.cfg
authorized_for_system_information=nagiosadmin
authorized_for_configuration_information=nagiosadmin
authorized_for_system_commands=nagiosadmin
authorized_for_all_services=nagiosadmin
authorized_for_all_hosts=nagiosadmin
authorized_for_all_service_commands=nagiosadmin
authorized_for_all_host_commands=nagiosadmin
[root@nagios etc]# sed -i 's/nagiosadmin/nagiosadmin,nagios/g' cgi.cfg
[root@nagios etc]# grep nagiosadmin cgi.cfg
authorized_for_system_information=nagiosadmin,nagios
authorized_for_configuration_information=nagiosadmin,nagios
authorized_for_system_commands=nagiosadmin,nagios
authorized_for_all_services=nagiosadmin,nagios
authorized_for_all_hosts=nagiosadmin,nagios
authorized_for_all_service_commands=nagiosadmin,nagios
authorized_for_all_host_commands=nagiosadmin,nagios
修改 nagios.cfg(自定义一些配置)
[root@nagios etc]# vi nagios.cfg +34
#注释掉下面这行
#cfg_file=/usr/local/nagios/etc/objects/localhost.cfg
#添加下面两行内容
cfg_file=/usr/local/nagios/etc/objects/services.cfg
cfg_file=/usr/local/nagios/etc/objects/hosts.cfg
创建 hosts.cfg 和 services.cfg 这两个文件
[root@nagios etc]# cd objects/
[root@nagios objects]# pwd
/usr/local/nagios/etc/objects
[root@nagios objects]# touch services.cfg
[root@nagios objects]# head -51 localhost.cfg  > hosts.cfg
[root@nagios objects]# chown -R nagios.nagios *
修改 nagios 检查语法脚本
[root@nagios objects]# vim /etc/init.d/nagios +181
#check_config
$NagiosBin -v $NagiosCfgFile;
vi commands.cfg 进入后按 shift+ g 切到结尾加入下面内容。
# 'check_nrpe' command definition
define command{
        command_name    check_nrpe
        command_line    $USER1$/check_nrpe -H $HOSTADDRESS$ -c $ARG1$
        }

# 'check_ping' command definition
define command{
        command_name    check-ping
        command_line    $USER1$/check_ping -H $HOSTADDRESS$ -w 100.0,20% -c 200.0,50% -p 3 -t 2
        }

# 'check_http' command definition
define command{
        command_name    check-weburl
        command_line    $USER1$/check_http -H $HOSTADDRESS$ $ARG1$ -w 5 -c 10
        }

# 'check_tcp' command definition
define command{
        command_name    check-tcp
        command_line    $USER1$/check_tcp -H $HOSTADDRESS$ -p $ARG1$ -w 0.02 -c 0.1
        }
查看有哪些 cfg 文件
[root@nagios objects]# pwd
/usr/local/nagios/etc/objects
[root@nagios objects]# ll
总用量 100
-rw-rw-r-- 1 nagios nagios  7860 4 月  24 16:53 commands.cfg
-rw-rw-r-- 1 nagios nagios  2138 4 月  21 17:00 contacts.cfg
-rw-r--r-- 1 nagios nagios  1843 4 月  24 16:46 hosts.cfg
-rw-rw-r-- 1 nagios nagios  5379 4 月  21 17:00 localhost.cfg
-rw-rw-r-- 1 nagios nagios  3070 4 月  21 17:00 printer.cfg
-rw-r--r-- 1 nagios nagios     0 4 月  24 16:46 services.cfg
-rw-rw-r-- 1 nagios nagios  3252 4 月  21 17:00 switch.cfg
-rw-rw-r-- 1 nagios nagios 10595 4 月  21 17:00 templates.cfg
-rw-rw-r-- 1 nagios nagios  3180 4 月  21 17:00 timeperiods.cfg
-rw-rw-r-- 1 nagios nagios  3991 4 月  21 17:00 windows.cfg
常用对象介绍
联系人
contact
出了问题像谁报告? 一般当然是系统管理员了监控时间段
timeperiod
7X24 小时不间断还是周一至周五, 或是自定义的其他时间段被监控主机
host
所需要监控的服务器, 当然可以是监控机自己监控命令
command
nagios 发出的哪个指令来执行某个监控, 这也是自己定义的被监控的服务
service
例如主机是否存活,80 端口是否开, 磁盘使用情况或者自定义的服务等
contacts.cfg 文件介绍
service_notification_period 24×7
服务出了状况通知的时间段, 这个时间段就是上面在 timeperiods.cfg 中定义的.host_notification_period 24×7
主机出了状况通知的时间段, 这个时间段就是上面在 timeperiods.cfg 中定义的service_notification_options w,u,c,r
当服务出现 w—报警(warning),u—未知(unkown),c—严重(critical), 或者 r—从异常情况恢复正常, 在这四种情况下通知联系人.host_notification_options d,u,r
当主机出现 d—当机(down),u—返回不可达(unreachable),r—从异常情况恢复正常, 在这 3 种情况下通知联系人service_notification_commands notify- service -by-email
服务出问题通知采用的命令 notify-by-email, 这个命令是在 commands.cfg 中定义的, 作用是给联系人发邮件. 至于 commands.cfg 之后将专门介绍host_notification_commands host-notify-by-email notify- host–by-email
同上, 主机出问题时采用的也是发邮件的方式通知联系人email 123456@qq.com
很明显, 联系的人 email 地址pager 1338757xxxx
联系人的手机, 如果支持短信的通知的话, 这个就很有用了.alias 是联系人别名,address 是地址 .
contactgroups.cfg 文件介绍
# contactgroup define contactgroup{contactgroup_name 组名 // 联系人组的名称 alias 别名 // 别名 members 用户名 // 组的成员, 来自于上面定义的 contacts.cfg, 如果有多个联系人则以逗号相隔}
主机模板介绍(hosts.cfg)
# host define host{host_name 主机名 // 被监控主机的名称, 最好别带空格 nagios-server alias 别名 address IP // 被监控主机的 IP 地址 check_command check-host-alive // 监控的命令 check-host-alive, 这个命令来自 commands.cfg, 用来监控主机是否存活 max_check_attempts 5 // 检查失败后重试的次数 check_period 24x7 // 检查的时间段 24x7, 同样来自于我们之前在 timeperiods.cfg 中定义的 contact_groups 组名 // 联系人组, 上面在 contactgroups.cfg 中定义的组名 notification_interval 10 // 提醒的间隔, 每隔 10 秒提醒一次 notification_period 24x7 // 提醒的周期, 24x7, 同样来自于我们之前在 timeperiods.cfg 中定义的 notification_options d,u,r // 指定什么情况下提醒, 具体含义见之前 contacts.cfg 部分的介绍}
主机组模板介绍(hosts.cfg)
# hostgroup define hostgroup{hostgroup_name 主机组名 alias 别名 members 主机名 // 组的成员主机, 多个主机以逗号相隔, 必须是上面 hosts.cfg 中定义的}
服务模板介绍(services.cfg)
# service definition define service{host_name 主机名 // 被监控的主机,hosts.cfg 中定义的 service_description check-host-alive // 这个监控项目的描述(也可以说是这个项目的名称), 可以空格, 我们这里定义的是监控这个主机是不是存活 check_command check-host-alive // 所用的命令, 是 commands.cfg 中定义的 max_check_attempts 5 normal_check_interval 3 retry_check_interval 2 check_period 24x7 // 监控的时间段, 是 timeperiods.cfg 中定义的 notification_interval 10 notification_period 24x7 // 通知的时间段, , 是 timeperiods.cfg 中定义的 notification_options w,u,c,r // 在监控的结果是 wucr 时通知联系人, 具体含义看前文. contact_groups 组名 // 联系人组, 是 contactgroups.cfg 中定义的 }
主机模板配置
[root@nagios objects]# vi hosts.cfg +21
删除下面 11 行内容
添加下面内容

# Define some hosts

###########172.16.0.18##################

define host {
        use                      linux-server
        host_name                nagios
        alias                    nagios
        address                  172.16.0.18
        check_command            check-host-alive
        max_check_attempts        3
        normal_check_interval     2
        retry_check_interval      2
        check_period              24x7
        notification_interval     300
        notification_period       24x7
        notification_options      d,u,r
        contact_groups            admins
        process_perf_data         1
}

###########172.16.0.18##################

define host {
        use                      linux-server
        host_name                client1
        alias                    client1
        address                  172.16.0.20
        check_command            check-host-alive
        max_check_attempts        3
        normal_check_interval     2
        retry_check_interval      2
        check_period              24x7
        notification_interval     300
        notification_period       24x7
        notification_options      d,u,r
        contact_groups            admins
        process_perf_data         1
}

把监控的主机添加到主机组里面
[root@nagios objects]# vi hosts.cfg +76
define hostgroup{
        hostgroup_name  linux-servers ; The name of the hostgroup
        alias           Linux Servers ; Long name of the group
        members         nagios,client1     ; Comma separated list of hosts that belong to this group
        }
简介
Nagios 是一款自动化运维工具,可以协助运维人员监控服务器的运行状况,并且拥有报警功能。本文章将介绍其安装方法和详细的配置方法。
nagios 监控服务应用指南
本地资源:负载,CPU,磁盘,内存。IO,RAID,温度,passwd 文件变化,本地所有文件指纹识别
网络服务:端口,URL,丢包,进程,网络流量
其他设备:交换机,打印机,windows 等。
业务数据:用户登录失败次数,用户登录网站次数,输入验证码失败的次数,某个 API 接口流量并发,电商网站订单,支付交易的数量nagios 成员:主程序 nagios,插件 nagios-plugins,和一些可选的客户端 nrpe,NSClient++,NSCA 和 NDOUtils
NRPE– 半被动模式
存放位置:安装在客户端
NRPE 作用:在客户端执行相关的脚本插件来获取数据,实现对客户端主机资源的监控。
存在形式:守护进程 (agent) 模式,开启的端口 5666NSClient++:半被动模式,相当于 linux 系统的 nrpe
NDOUtils(不推荐用)
存在位置:服务端
作用:用于将 nagios 的配置信息和各 event 产生的数据存入数据库中,以实现对这些数据的检索和处理。NSCA:纯被动模式 —> 用在分布式监控环境中
位置:NSCA 需要同时安装在 nagios 的服务器端和客户端
软件版本
nagios 版本:4.3.1
nagios-plugins 版本:2.2.1
nrpe 版本:3.1.0
实现环境
nagios 运行在 LAMP 环境下(如果还没有安装 LAMP 环境,可以参考下我的安装 LNMP 文章 http://www.linuxidc.com/Linux/2017-10/147581.htm,因为我已经编译安装了 php 和 Mysql,本文直接采取 yum 方式安装 apache,当然也可以采取编译方式安装 apache。看个人喜好和公司需求)
CentOS 版本:CentOS Linux release 7.3.1611 (Core) 64 位
Apache 版本:Apache/2.4.6
Nginx 版本: nginx 1.12.0
Mysql 版本:mysql 5.7.18
PHP 版本:php 7.1.4
下载 nagios 软件及插件包
[root@nagios ~]# cd /software/
[root@nagios software]# wget https://assets.nagios.com/downloads/nagioscore/releases/nagios-4.3.1.tar.gz
[root@nagios software]# wget https://nagios-plugins.org/download/nagios-plugins-2.2.1.tar.gz
[root@nagios software]# wget https://sourceforge.net/projects/nagios/files/nrpe-3.x/nrpe-3.1.0.tar.gz
[root@nagios software]# ll
-rw-r--r--   1 root  root  11095797 4 月  21 15:57 nagios-4.3.1.tar.gz
-rw-r--r--   1 root  root   2728818 4 月  20 00:04 nagios-plugins-2.2.1.tar.gz
-rw-r--r--   1 root  root    501028 4 月  17 22:36 nrpe-3.1.0.tar.gz
安装 nagios-server 服务端
安装依赖包
[root@nagios software]# yum -y install httpd httpd-devel gcc glibc glibc-common gd gd-devel perl-devel perl-CPAN fcgi perl-FCGI perl-FCGI-ProcManager解压 nagios 源码包
[root@nagios software]# tar zxvf nagios-4.3.1.tar.gz进入解压后的目录
[root@nagios software]# cd nagios-4.3.1/创建 ngaios 用户和组(把 nginx 启动用户 www 加入到 nagios 相关组)
[root@nagios nagios-4.3.1]# useradd nagios -s /sbin/nologin
[root@nagios nagios-4.3.1]# id www
[root@nagios nagios-4.3.1]# groupadd nagcmd
[root@nagios nagios-4.3.1]# usermod -a -G nagcmd nagios
[root@nagios nagios-4.3.1]# usermod -a -G nagcmd www
[root@nagios nagios-4.3.1]# id -n -G nagios
[root@nagios nagios-4.3.1]# id -n -G www
配置 nagios
[root@client1 nagios-4.3.1]# ./configure --with-command-group=nagcmd编译和安装
[root@nagios nagios-4.3.1]# make all
[root@nagios nagios-4.3.1]# make install-init
[root@nagios nagios-4.3.1]# make install-commandmode
[root@nagios nagios-4.3.1]# make install-config
[root@nagios nagios-4.3.1]# make install
[root@nagios nagios-4.3.1]# cp -R contrib/eventhandlers/ /usr/local/nagios/libexec/
[root@nagios nagios-4.3.1]# chown -R nagios:nagios /usr/local/nagios/libexec/eventhandlers
[root@nagios nagios-4.3.1]# /usr/local/nagios/bin/nagios -v /usr/local/nagios/etc/nagios.cfg
生成 apache 配置文件
[root@nagios nagios-4.3.1]# make install-webconf
/usr/bin/install -c -m 644 sample-config/httpd.conf /etc/httpd/conf.d/nagios.conf
if [0 -eq 1]; then \
    ln -s /etc/httpd/conf.d/nagios.conf /etc/apache2/sites-enabled/nagios.conf; \
fi

*** Nagios/Apache conf file installed ***
生成 nagios web 界面的验证信息
[root@nagios nagios-4.3.1]# htpasswd -c /usr/local/nagios/etc/htpasswd.users nagios
New password:   ==> 输入密码,这里我输入的密码是 nagios,记住这个密码
Re-type new password:  ==> 确认密码
Adding password for user nagios
修改 apache 配置文件
vi /etc/httpd/conf/httpd.conf
Listen 80    ===>    修改为    Listen 8080
User apache    ===>    修改为    User www
Group apache    ===>    修改为    Group www
DirectoryIndex index.html    ===>    修改为    DirectoryIndex index.php index.html
AddType application/x-gzip .gz .tgz    ===>    下面添加一行内容  AddHandler application/x-httpd-php .php
# LoadModule foo_module modules/mod_foo.so    ===>    下面添加一行内容
 LoadModule php7_module        modules/libphp7.so
apache 配置文件参考
[root@nagios httpd]# grep -v '^$' /etc/httpd/conf/httpd.conf|grep -v '#'
ServerRoot "/etc/httpd"
Listen 8080
LoadModule php7_module        modules/libphp7.so
Include conf.modules.d/*.conf
User www
Group www
ServerAdmin root@localhost
<Directory />
    AllowOverride none
    Require all denied
</Directory>
DocumentRoot "/var/www/html"
<Directory "/var/www">
    AllowOverride None
    Require all granted
</Directory>
<Directory "/var/www/html">
    Options Indexes FollowSymLinks
    AllowOverride None
    Require all granted
</Directory>
<IfModule dir_module>
    DirectoryIndex index.php index.html
</IfModule>
<Files ".ht*">
    Require all denied
</Files>
ErrorLog "logs/error_log"
LogLevel warn
<IfModule log_config_module>
    LogFormat "%h %l %u %t \"%r\"%>s %b \"%{Referer}i\"\"%{User-Agent}i\"" combined
    LogFormat "%h %l %u %t \"%r\"%>s %b" common
    <IfModule logio_module>
      LogFormat "%h %l %u %t \"%r\"%>s %b \"%{Referer}i\"\"%{User-Agent}i\"%I %O" combinedio
    </IfModule>
    CustomLog "logs/access_log" combined
</IfModule>
<IfModule alias_module>
    ScriptAlias /cgi-bin/ "/var/www/cgi-bin/"
</IfModule>
<Directory "/var/www/cgi-bin">
    AllowOverride None
    Options None
    Require all granted
</Directory>
<IfModule mime_module>
    TypesConfig /etc/mime.types
    AddType application/x-compress .Z
    AddType application/x-gzip .gz .tgz
    AddHandler application/x-httpd-php .php
    AddType text/html .shtml
    AddOutputFilter INCLUDES .shtml
</IfModule>
AddDefaultCharset UTF-8
<IfModule mime_magic_module>
    MIMEMagicFile conf/magic
</IfModule>
EnableSendfile on
IncludeOptional conf.d/*.conf
重新编译一下 php,使其直接 apache(也就是编译参数加上 –with-apxs2)
[root@nagios nagios-4.3.1]# cd /software/php-7.1.4/
[root@nagios php-7.1.4]# ./configure --prefix=/usr/local/php --enable-fpm --with-fpm-user=nginx --with-fpm-group=nginx --with-mysqli --with-zlib --with-curl --with-gd --with-jpeg-dir --with-png-dir --with-freetype-dir --with-openssl --enable-mbstring --enable-xml --enable-session --enable-ftp --enable-pdo -enable-tokenizer --enable-zip --with-apxs2
[root@nagios php-7.1.4]# make && make install
[root@nagios php-7.1.4]# cd /etc/httpd/
[root@nagios httpd]# ll /etc/httpd/modules/libphp7.so
-rwxr-xr-x 1 root root 38908880 4 月  24 10:34 /etc/httpd/modules/libphp7.so    ===>    可以看到这个模块已经生成
启动 apache
[root@nagios httpd]# systemctl start httpd
[root@nagios httpd]# systemctl enable httpd
启动 nagios
chkconfig nagios on
/etc/init.d/nagios start
在浏览器输入 ip:8080/nagios 测试 nagios-web 页面是否可以打开
安装 nagios-plugins 插件
解压 nagios-plugins 源码包
[root@nagios httpd]# cd /software/
[root@nagios software]# tar zxvf nagios-plugins-2.2.1.tar.gz
进入解压后的目录进行配置
[root@nagios software]# cd nagios-plugins-2.2.1/
[root@nagios nagios-plugins-2.2.1]# ./configure --with-nagios-user=nagios --with-nagios-group=nagcmd --enable-perl-modules
编译及安装
[root@nagios nagios-plugins-2.2.1]# make && make install安装 nrpe
解压 nrpe 源码包
[root@nagios nagios-plugins-2.2.1]# cd /software/
[root@nagios software]# tar zxvf nrpe-3.1.0.tar.gz
进去解压后的目录进行配置
[root@nagios software]# cd nrpe-3.1.0/
[root@nagios nrpe-3.1.0]# ./configure
编译及安装
[root@nagios nrpe-3.1.0]# make all
[root@nagios nrpe-3.1.0]# make install-plugin
[root@nagios nrpe-3.1.0]# make install-daemon
[root@nagios nrpe-3.1.0]# make install-daemon-config
[root@nagios nrpe-3.1.0]# cp sample-config/nrpe.cfg /usr/local/nagios/etc/nrpe.cfg
安装完成后,查看下 libexec 下面是否有插件
[root@nagios nrpe-3.1.0]# ls /usr/local/nagios/libexec/
check_apt       check_flexlm        check_log          check_ntp_peer  check_smtp    disable_active_service_checks
check_breeze    check_fping         check_mailq        check_ntp_time  check_spop    disable_notifications
check_by_ssh    check_ftp           check_mrtg         check_nwstat    check_ssh     distributed-monitoring
check_clamd     check_http          check_mrtgtraf     check_Oracle    check_ssmtp   enable_active_service_checks
check_cluster   check_icmp          check_mysql        check_overcr    check_swap    enable_notifications
check_dhcp      check_ide_smart     check_mysql_query  check_ping      check_tcp     eventhandlers
check_dig       check_ifoperstatus  check_nagios       check_pop       check_time    negate
check_disk      check_ifstatus      check_nntp         check_procs     check_udp     redundancy-scenario1
check_disk_smb  check_imap          check_nntps        check_real      check_ups     submit_check_result
check_dns       check_ircd          check_nrpe         check_rpc       check_uptime  urlize
check_dummy     check_jabber        check_nt           check_sensors   check_users   utils.pm
check_file_age  check_load          check_ntp          check_simap     check_wave    utils.sh
启动 nrpe,并测试服务端本地是否可以连通
[root@nagios nrpe-3.1.0]# /usr/local/nagios/bin/nrpe -d -c /usr/local/nagios/etc/nrpe.cfg
[root@nagios nrpe-3.1.0]# echo "/usr/local/nagios/bin/nrpe -d -c /usr/local/nagios/etc/nrpe.cfg" >> /etc/rc.local
[root@nagios nrpe-3.1.0]# chmod +x /etc/rc.d/rc.local           # centos 7 下需要这一步,不然 /etc/rc.local 中的内容开机可能不执行
[root@nagios nrpe-3.1.0]# netstat -lnput|grep 5666
tcp        0      0 0.0.0.0:5666            0.0.0.0:*               LISTEN      67176/nrpe
tcp6       0      0 :::5666                 :::*                    LISTEN      67176/nrpe
[root@nagios nrpe-3.1.0]# /usr/local/nagios/libexec/check_nrpe -H localhost
NRPE v3.1.0-rc1更多详情见请继续阅读下一页的精彩内容:http://www.linuxidc.com/Linux/2017-10/147580p2.htm
服务模板配置
[root@nagios objects]# pwd
/usr/local/nagios/etc/objects
[root@nagios objects]# vi services.cfg
添加下面内容

###########172.16.0.18##################

define service{
        use                     generic-service
        host_name               nagios
        service_description     Load
        check_command           check_nrpe!check_load        #这里的 check_nrpe 不是服务端 /usr/local/nagios/libexec/check_nrpe, 而是 command.cfg 里定义的命令
        }

define service{
        use                     generic-service
        host_name               nagios
        service_description     Disk
        check_command           check_nrpe!check_disk
        }

define service{
        use                     generic-service
        host_name               nagios
        service_description     memory
        check_command           check_nrpe!check_mem
        }
define service{
        use                     generic-service
        host_name               nagios
        service_description     Ping
        check_command           check-ping!172.16.0.18
}

define service{
        use                     generic-service
        host_name               nagios
        service_description     port_3306
        check_command           check-tcp!3306
}

###########172.16.0.20##################

define service{
        use                     generic-service
        host_name               client1
        service_description     Load
        check_command           check_nrpe!check_load
        }

define service{
        use                     generic-service
        host_name               client1
        service_description     Disk
        check_command           check_nrpe!check_disk
        }

define service{
        use                     generic-service
        host_name               client1
        service_description     memory
        check_command           check_nrpe!check_mem
        }
define service{
    use             generic-service
        host_name               client1
        service_description     Ping
        check_command           check-ping!172.16.0.20
}
define service{
        use                     generic-service
        host_name               client1
        service_description     port_3306
        check_command           check-tcp!3306
}
重启 nagios 服务
[root@nagios objects]# /etc/init.d/nagios restart打开浏览器访问
点击 hosts
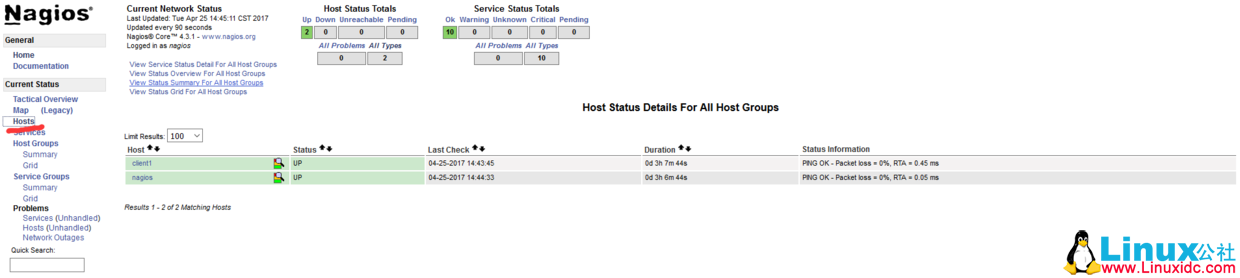
点击 services
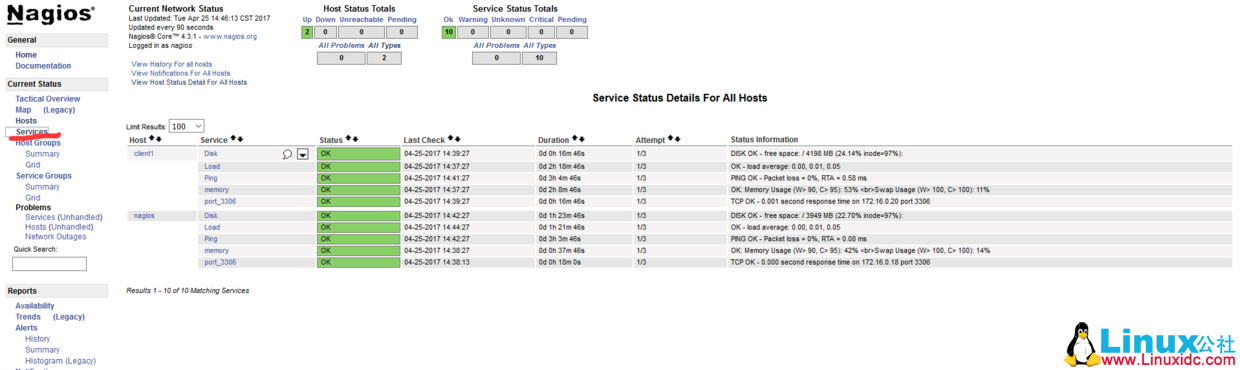
ok,我们的配置告一段落了。
出图部分
下载 pnp4nagios 源码包
[root@nagios objects]# cd /software/
[root@nagios software]# wget https://jaist.dl.sourceforge.net/project/pnp4nagios/PNP-0.6/pnp4nagios-0.6.25.tar.gz
安装依赖包
[root@nagios software]# yum install cairo pango perl-rrdtool rrdtool librrds-perl zlib zlib-devel freetype freetype-devel gd gd-devel -y解压 pnp4nagios 源码包
[root@nagios software]# tar zxf pnp4nagios-0.6.25.tar.gz进入解压后的目录配置 png
[root@nagios pnp4nagios-0.6.25]# ./configure --with-nagios-user=nagios --with-nagios-group=nagios编译及安装
[root@nagios pnp4nagios-0.6.25]# make all
[root@nagios pnp4nagios-0.6.25]# make install
[root@nagios pnp4nagios-0.6.25]# make install-webconf
[root@nagios pnp4nagios-0.6.25]# make install-config
[root@nagios pnp4nagios-0.6.25]# make install-init
[root@nagios pnp4nagios-0.6.25]# cd sample-config/
[root@nagios sample-config]# make install-webconf
配置 pnp4nagios
[root@nagios sample-config]# cd /usr/local/pnp4nagios/etc/
[root@nagios etc]# mv misccommands.cfg-sample misccommands.cfg
[root@nagios etc]#  mv rra.cfg-sample rra.cfg
[root@nagios etc]# mv nagios.cfg-sample nagios.cfg
[root@nagios etc]# cd pages/
[root@nagios pages]# mv web_traffic.cfg-sample web_traffic.cfg
[root@nagios pages]#  cd ../check_commands/
[root@nagios check_commands]# mv check_all_local_disks.cfg-sample check_all_local_disks.cfg
[root@nagios check_commands]#  mv check_nrpe.cfg-sample check_nrpe.cfg
[root@nagios check_commands]# mv check_nwstat.cfg-sample check_nwstat.cfg
[root@nagios check_commands]# systemctl enable npcd
[root@nagios check_commands]# systemctl start npcd
配置 Nagios 数据输出接口 (以 BULK 模式运行) 详情参考官网 https://docs.pnp4nagios.org/pnp-0.6/config#bulk_mode:
[root@nagios check_commands]# vi /usr/local/nagios/etc/nagios.cfg
process_performance_data=1 #默认为 0,修改为 1

并在该文件中添加下面的内容

#

# service performance data

#

service_perfdata_file=/usr/local/pnp4nagios/var/service-perfdata

service_perfdata_file_template=DATATYPE::SERVICEPERFDATA\tTIMET::$TIMET$\tHOSTNAME::$HOSTNAME$\tSERVICEDESC::$SERVICEDESC$\tSERVICEPERFDATA::$SERVICEPERFDATA$\tSERVICECHECKCOMMAND::$SERVICECHECKCOMMAND$\tHOSTSTATE::$HOSTSTATE$\tHOSTSTATETYPE::$HOSTSTATETYPE$\tSERVICESTATE::$SERVICESTATE$\tSERVICESTATETYPE::$SERVICESTATETYPE$

service_perfdata_file_mode=a

service_perfdata_file_processing_interval=15

service_perfdata_file_processing_command=process-service-perfdata-file

#

# host performance data starting with Nagios

#

host_perfdata_file=/usr/local/pnp4nagios/var/host-perfdata

host_perfdata_file_template=DATATYPE::HOSTPERFDATA\tTIMET::$TIMET$\tHOSTNAME::$HOSTNAME$\tHOSTPERFDATA::$HOSTPERFDATA$\tHOSTCHECKCOMMAND::$HOSTCHECKCOMMAND$\tHOSTSTATE::$HOSTSTATE$\tHOSTSTATETYPE::$HOSTSTATETYPE$

host_perfdata_file_mode=a

host_perfdata_file_processing_interval=15

host_perfdata_file_processing_command=process-host-perfdata-file
配置 command.cfg
[root@nagios check_commands]#  vi /usr/local/nagios/etc/objects/commands.cfg
在该文件中添加下面的内容

define command{
      command_name    process-service-perfdata-file
      command_line    /usr/local/pnp4nagios/libexec/process_perfdata.pl --bulk=/usr/local/pnp4nagios/var/service-perfdata

}

define command{
      command_name    process-host-perfdata-file
      command_line    /usr/local/pnp4nagios/libexec/process_perfdata.pl --bulk=/usr/local/pnp4nagios/var/host-perfdata

}
在模板配置文件中添加图表图标模板:
[root@nagios check_commands]# vi /usr/local/nagios/etc/objects/templates.cfg
在该文件中添加下面的内容

define host {
  name      host-pnp
  action_url /pnp4nagios/index.php/graph?host=$HOSTNAME$&srv=_HOST_
  register  0
}

define service {
  name      service-pnp
  action_url /pnp4nagios/index.php/graph?host=$HOSTNAME$&srv=$SERVICEDESC$
  register  0

}
在监控主机和服务中调用图表模板(在主机和服务后面添加新的模板):
[root@nagios check_commands]# vi /usr/local/nagios/etc/objects/hosts.cfg
主机内容修改如下
###########172.16.0.18##################
define host {
use linux-server,host-pnp
host_name nagios
alias nagios
address 172.16.0.18
check_command check-host-alive
max_check_attempts 3
normal_check_interval 2
retry_check_interval 2
check_period 24x7
notification_interval 300
notification_period 24x7
notification_options d,u,r
contact_groups admins
process_perf_data 1
}
###########172.16.0.18##################
define host {
use linux-server,host-pnp
host_name client1
alias client1
address 172.16.0.20
check_command check-host-alive
max_check_attempts 3
normal_check_interval 2
retry_check_interval 2
check_period 24x7
notification_interval 300
notification_period 24x7
notification_options d,u,r
contact_groups admins
process_perf_data 1
}
[root@nagios check_commands]# vi /usr/local/nagios/etc/objects/services.cfg
服务内容修改如下
###########172.16.0.18##################
define service{
use generic-service,service-pnp
host_name nagios
service_description Load
check_command check_nrpe!check_load #这里的 check_nrpe 不是服务端 /usr/local/nagios/libexec/check_nrpe, 而是 command.cfg 里定义的命令
}
define service{
use generic-service,service-pnp
host_name nagios
service_description Disk
check_command check_nrpe!check_disk
}
define service{
use generic-service,service-pnp
host_name nagios
service_description memory
check_command check_nrpe!check_mem
}
define service{
use generic-service,service-pnp
host_name nagios
service_description Ping
check_command check-ping!172.16.0.18
}
define service{
use generic-service,service-pnp
host_name nagios
service_description port_3306
check_command check-tcp!3306
}
###########172.16.0.20##################
define service{
use generic-service,service-pnp
host_name client1
service_description Load
check_command check_nrpe!check_load
}
define service{
use generic-service,service-pnp
host_name client1
service_description Disk
check_command check_nrpe!check_disk
}
define service{
use generic-service,service-pnp
host_name client1
service_description memory
check_command check_nrpe!check_mem
}
define service{
use generic-service,service-pnp
host_name client1
service_description Ping
check_command check-ping!172.16.0.20
}
define service{
use generic-service,service-pnp
host_name client1
service_description port_3306
check_command check-tcp!3306
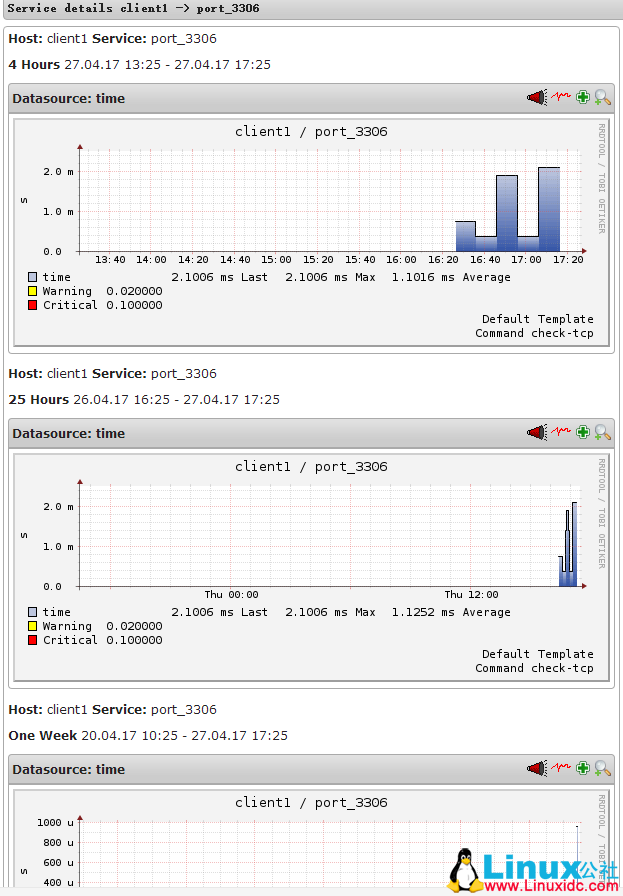
}图表展示
重启 nagios 和 apache
[root@nagios check_commands]# /etc/init.d/nagios checkconfig
[root@nagios check_commands]# /etc/init.d/nagios restart
[root@nagios check_commands]# systemctl restart httpd
访问 nagios 界面即可看到图表小图标:
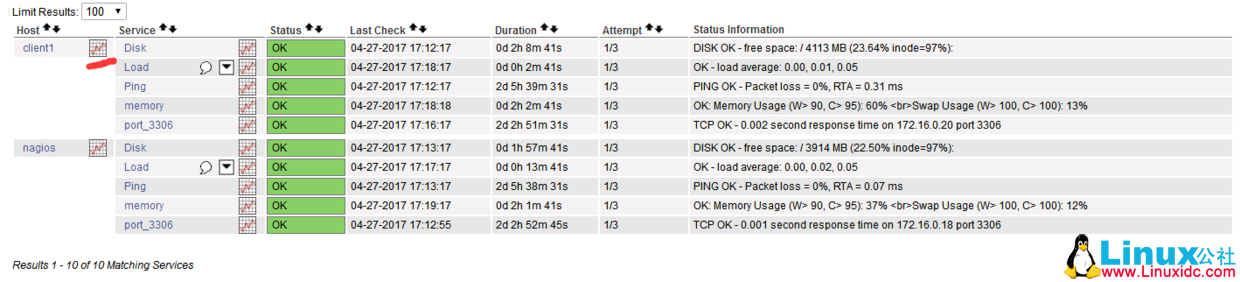
点击图标会显示 pnp4nagios 测试页面:
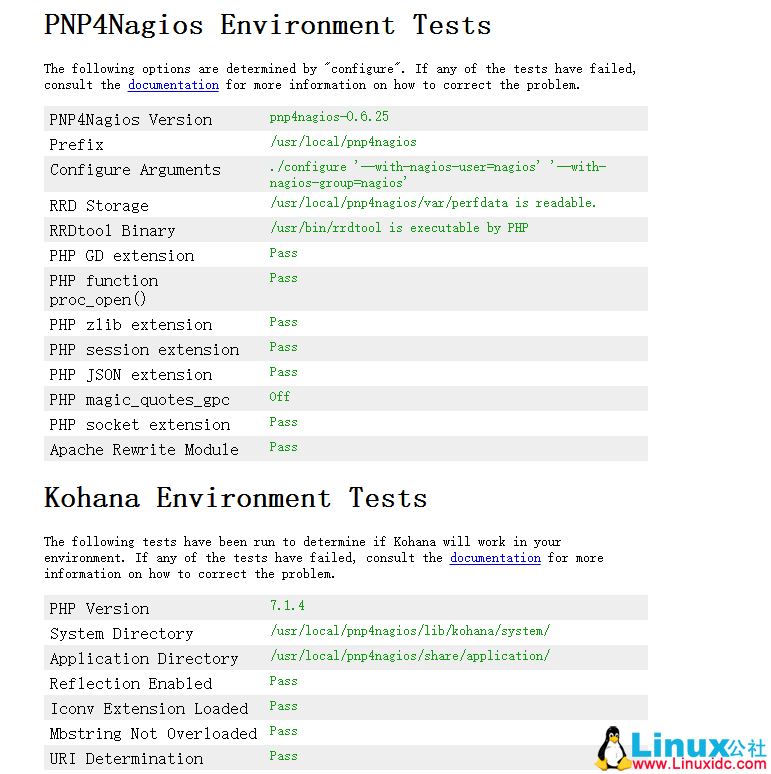
全是绿色代表配置正常,如果不是全绿,要逐个解决错误。然后移除或修改 install.php 文件:
[root@nagios ~]# rm -rf /usr/local/pnp4nagios/share/install.php再次点击图标就会显示当前监控服务由 pnp4nagios 生成的图表了
邮件报警配置
查看 sendmail 邮件系统是否安装
[root@nagios ~]# rpm -qa|grep sendmail如果没有安装,可以 yum 安装一下
[root@nagios ~]# yum -y install sendmail启动 sendmail
[root@nagios ~]# systemctl enable sendmail
[root@nagios ~]# systemctl start sendmail
测试发送邮件:
[root@nagios ~]# echo "test" | mail zhengxinlei@test.com.cn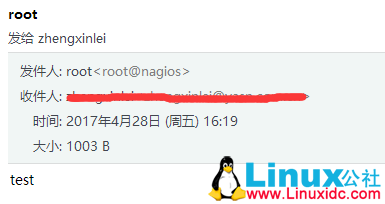
发送外部邮件的时候,这种本地形式的发件人和发件地址容易被误认为垃圾邮件而拒收。
我们这里定义邮件发送 smtp 信息。
首先安装 mailx12.5
wget http://fossies.org/linux/misc/old/mailx-12.5.tar.gz
tar zxf mailx-12.5.tar.gz
cd mailx-12.5
make
make install UCBINSTALL=/usr/bin/install
mv /bin/mail /bin/mail_old
ln -s /usr/local/bin/mailx /bin/mail
mail -V
接下来配置外部 smtp 发件信息
vi /etc/nail.rc
添加如下内容:set bsdcompat
set from=yunwei@yasn.com.cn
set smtp=smtp.yasn.com.cn
set smtp-auth-user=yunwei@yasn.com.cn
set smtp-auth-password=123456
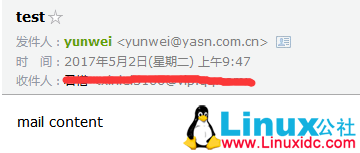
set smtp-auth=login测试邮件发送
echo 'mail content'|mail -s test zhengxinlei@test.com.cn发送邮件测试,可以看到发件人是我们设定的外部邮件发件人
编辑 contacts.cfg,定义邮件联系人和组
[root@nagios ~]# cd /usr/local/nagios/etc/objects/
[root@nagios objects]# ls
commands.cfg  localhost.cfg~  services.cfg  templates.cfg    hosts.cfg    printer.cfg
switch.cfg   windows.cfg contacts.cfg   localhost.cfg  timeperiods.cfg
[root@nagios objects]# vi contacts.cfg              // 修改内容如下
define contact{
        contact_name                    nagiosadmin             ; Short name of user
        use                             generic-contact         ; Inherit default values from generic-contact template (defined above)
        alias                           Nagios Admin            ; Full name of user

        #email                           nagios@localhost       ; <<***** CHANGE THIS TO YOUR EMAIL ADDRESS ******
        email                           3166@vip.qq.com,xinlei@126.com
        }


define contactgroup{
        contactgroup_name       admins
        alias                   Nagios Administrators
        members                 nagiosadmin
        }
编辑 commands.cfg 文件,定义邮件发送命令
[root@nagios objects]# vi commands.cfg // 查看下面内容是否存在,不存在则添加
# 'notify-host-by-email' command definition
define command{
command_name notify-host-by-email
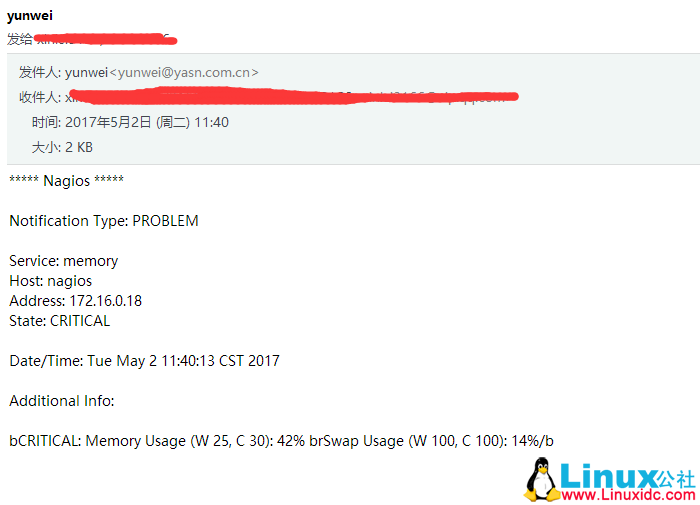
command_line /usr/bin/printf "%b" "***** Nagios ***** Notification Type: $NOTIFICATIONTYPE$ Host: $HOSTNAME$ State: $HOSTSTATE$ Address: $HOSTADDRESS$ Info: $HOSTOUTPUT$ Date/Time: $LONGDATETIME$" | /bin/mail -s "** $NOTIFICATIONTYPE$ Host Alert: $HOSTNAME$ is $HOSTSTATE$ **" $CONTACTEMAIL$
}
# 'notify-service-by-email' command definition
define command{
command_name notify-service-by-email
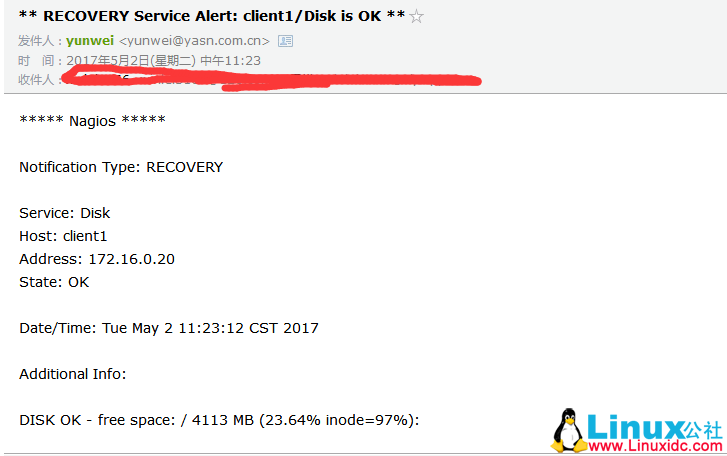
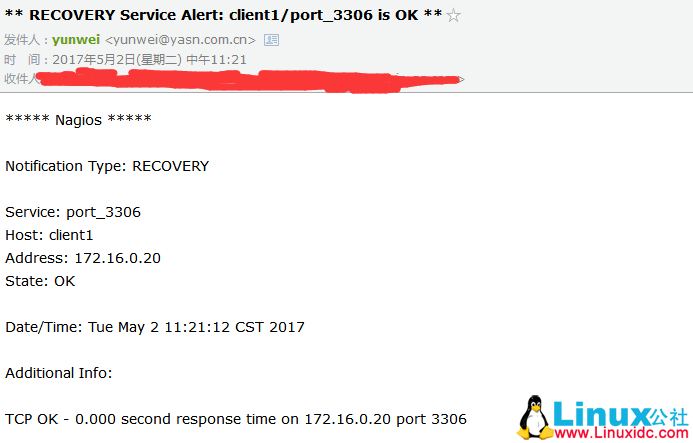
command_line /usr/bin/printf "%b" "***** Nagios ***** Notification Type: $NOTIFICATIONTYPE$ Service: $SERVICEDESC$ Host: $HOSTALIAS$ Address: $HOSTADDRESS$ State: $SERVICESTATE$ Date/Time: $LONGDATETIME$ Additional Info: $SERVICEOUTPUT$" | /bin/mail -s "** $NOTIFICATIONTYPE$ Service Alert: $HOSTALIAS$/$SERVICEDESC$ is $SERVICESTATE$ **" $CONTACTEMAIL$
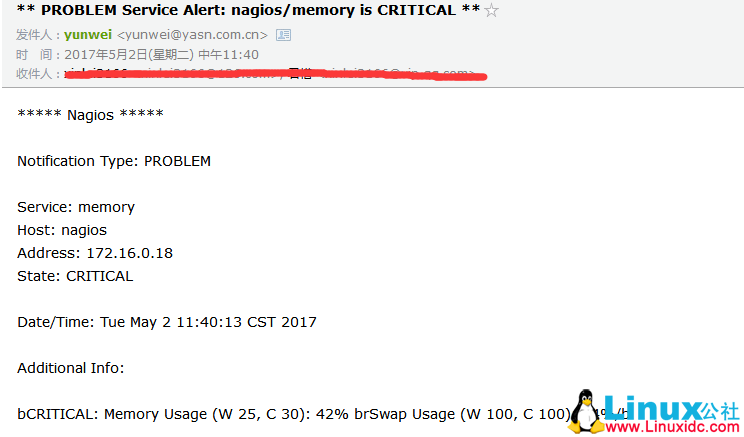
}修改一下监控的阀值,模拟报警。

重启 nagios 服务和 sendmail 服务
[root@nagios ~]# systemctl restart nagios
[root@nagios ~]# systemctl stop sendmail
[root@nagios ~]# ps -ef|grep sendmail
[root@nagios ~]# systemctl start sendmail
[root@nagios ~]# ps -ef|grep sendmail
查看报警的邮件,来几张图吧:
这是报警恢复后的邮件:
ok,搞定了。
常见邮件发送报错:
报错 1

解决方法:
修改 hosts 为域名形式

[root@nagios objects]# cat /etc/hosts
172.16.0.18 nagios nagios.com
报错 2(发送外部邮件的时候,这种本地形式的发件人和发件地址容易被误认为垃圾邮件而拒收。)

解决方法,见上面配置 mail 发件人 smtp 信息。
●监视物理组件的高级 Linux 命令(仅供参考)
内存:top free、vmstat、mpstat、iostat、sar
CPU:top vmstat、mpstat、iostat、sar
I/O:vmstat、mpstat、iostat、sar
进程:ipcs、ipcrm
负载:uptime
一键安装 nagios 命令参考
#############nagios-server-install########################
mkdir /software/
# mv nagios-4.3.1.tar.gz nagios-plugins-2.2.1.tar.gz nrpe-3.1.0.tar.gz pnp4nagios-0.6.25.tar.gz /software/
cd /software/
wget https://assets.nagios.com/downloads/nagioscore/releases/nagios-4.3.1.tar.gz
wget https://nagios-plugins.org/download/nagios-plugins-2.2.1.tar.gz
wget https://sourceforge.net/projects/nagios/files/nrpe-3.x/nrpe-3.1.0.tar.gz
wget https://jaist.dl.sourceforge.net/project/pnp4nagios/PNP-0.6/pnp4nagios-0.6.25.tar.gz
yum -y install httpd httpd-devel gcc glibc glibc-common gd gd-devel perl-devel perl-CPAN fcgi perl-FCGI perl-FCGI-ProcManager
tar zxvf nagios-4.3.1.tar.gz
cd nagios-4.3.1/
useradd nagios -s /sbin/nologin
id www
groupadd nagcmd
usermod -a -G nagcmd nagios
usermod -a -G nagcmd www
id -n -G nagios
id -n -G www
./configure --with-command-group=nagcmd
make all
make install-init
make install-commandmode
make install-config
make install
sleep 2
cp -R contrib/eventhandlers/ /usr/local/nagios/libexec/
chown -R nagios:nagios /usr/local/nagios/libexec/eventhandlers
/usr/local/nagios/bin/nagios -v /usr/local/nagios/etc/nagios.cfg
make install-webconf
echo 'nagios:$apr1$UigX6LG0$29RugFJZTSxRjnX4NIH3E0' > /usr/local/nagios/etc/htpasswd.users
sed -i 's/Listen 80/Listen 8080/g' /etc/httpd/conf/httpd.conf
sed -i 's/User apache/User www/g' /etc/httpd/conf/httpd.conf
sed -i 's/Group apache/Group www/g' /etc/httpd/conf/httpd.conf
sed -i 's/DirectoryIndex index.html/DirectoryIndex index.php index.html/g' /etc/httpd/conf/httpd.conf
grep 'Listen' /etc/httpd/conf/httpd.conf
grep 'User' /etc/httpd/conf/httpd.conf
grep 'Group' /etc/httpd/conf/httpd.conf
grep 'DirectoryIndex' /etc/httpd/conf/httpd.conf
cd /software/php-7.1.4/
./configure --prefix=/usr/local/php --enable-fpm --with-fpm-user=www --with-fpm-group=www --with-mysqli --with-zlib --with-curl --with-gd --with-jpeg-dir --with-png-dir --with-freetype-dir --with-openssl --enable-mbstring --enable-xml --enable-session --enable-ftp --enable-pdo -enable-tokenizer --enable-zip --with-apxs2
make && make install
sleep 1

cd /etc/httpd/
ll /etc/httpd/modules/libphp7.so
systemctl start httpd
systemctl enable httpd
chkconfig nagios on
/etc/init.d/nagios start
cd /software/
tar zxvf nagios-plugins-2.2.1.tar.gz
cd nagios-plugins-2.2.1/
./configure --with-nagios-user=nagios --with-nagios-group=nagcmd --enable-perl-modules
make && make install

cd /software/
tar zxvf nrpe-3.1.0.tar.gz
cd nrpe-3.1.0/
./configure
make all
make install-plugin
make install-daemon
make install-daemon-config
cp sample-config/nrpe.cfg /usr/local/nagios/etc/nrpe.cfg
ls /usr/local/nagios/libexec/
/usr/local/nagios/bin/nrpe -d -c /usr/local/nagios/etc/nrpe.cfg
echo "/usr/local/nagios/bin/nrpe -d -c /usr/local/nagios/etc/nrpe.cfg" >> /etc/rc.local
chmod +x /etc/rc.d/rc.local
netstat -lnput|grep 5666
/usr/local/nagios/libexec/check_nrpe -H localhost


#######################nagios-client-install###########################
mkdir /software/
# mv nagios-plugins-2.2.1.tar.gz nrpe-3.1.0.tar.gz /software/
cd /software/
wget https://nagios-plugins.org/download/nagios-plugins-2.2.1.tar.gz
wget https://sourceforge.net/projects/nagios/files/nrpe-3.x/nrpe-3.1.0.tar.gz
yum install perl-devel perl-CPAN -y
useradd nagios -M -s /sbin/nologin
tar zxvf nagios-plugins-2.2.1.tar.gz
cd nagios-plugins-2.2.1/
./configure --with-nagios-user=nagios --with-nagios-group=nagios --enable-perl-modules
make && make install
sleep 1
cd ..
tar zxvf nrpe-3.1.0.tar.gz
cd nrpe-3.1.0/
./configure
make all
make install-plugin
make install-daemon
make install-daemon-config
mkdir /usr/local/nagios/etc/
cp sample-config/nrpe.cfg /usr/local/nagios/etc/nrpe.cfg
ls /usr/local/nagios/libexec/
/usr/local/nagios/bin/nrpe -d -c /usr/local/nagios/etc/nrpe.cfg
echo "/usr/local/nagios/bin/nrpe -d -c /usr/local/nagios/etc/nrpe.cfg" >> /etc/rc.local
chmod +x /etc/rc.d/rc.local
netstat -lnput|grep 5666
sed -i 's/allowed_hosts=127.0.0.1,::1/allowed_hosts=127.0.0.1,::1,172.16.0.1/g' /usr/local/nagios/etc/nrpe.cfg
sed -i 's/^command\[check/\#command\[check/g' /usr/local/nagios/etc/nrpe.cfg
cat >> /usr/local/nagios/etc/nrpe.cfg << EOF
# my custom monitor items
command[check_users]=/usr/local/nagios/libexec/check_users -w 5 -c 10
command[check_load]=/usr/local/nagios/libexec/check_load -r -w .15,.10,.05 -c .30,.25,.20
command[check_disk]=/usr/local/nagios/libexec/check_disk -w 20% -c 10% -p /
command[check_mem]=/usr/local/nagios/libexec/check_mem.pl -w 90% -c 95%
command[check_swap]=/usr/local/nagios/libexec/check_swap -w 20% -c 10%
EOF
/usr/local/nagios/libexec/check_nrpe -H localhost -c check_disk
总结:
多多查看 nagios 日志和 mail 日志,进行排错��
CentOS 7 下安装配置 Nagios 监控图文详解 http://www.linuxidc.com/Linux/2017-05/143886.htm
Nagios 邮件报警配置简述 http://www.linuxidc.com/Linux/2017-02/140834.htm
Nagios 本机及其他主机监控安装部署详解 http://www.linuxidc.com/Linux/2017-03/141600.htm
Nagios 系统监控基本安装配置过程详解 http://www.linuxidc.com/Linux/2017-01/139758.htm
Linux 下 Nagios+PNP4Nagios 的安装与配置 http://www.linuxidc.com/Linux/2016-09/135534.htm
CentOS7 安装 Nagios 并配置出图详解 http://www.linuxidc.com/Linux/2015-12/125777.htm
Linux 下 Nagios 安装配置详解 http://www.linuxidc.com/Linux/2017-05/144032.htm
Nagios 的详细介绍:请点这里
Nagios 的下载地址:请点这里
本文永久更新链接地址:http://www.linuxidc.com/Linux/2017-10/147580.htm